


Using a drill bit effectively involves several steps to ensure safety, precision, and efficiency. Here's a detailed guide on how to use a drill bit:
Step-by-Step Guide to Using a Drill Bit
1. Select the Right Drill Bit
Material: Choose a drill bit that matches the material you are drilling into (e.g., wood, metal, masonry).
Size: Select the appropriate size for the hole you need. For example, use a 1/4-inch bit for a 1/4-inch hole.
Type: Use the right type of bit for your task (e.g., twist bits for general drilling, masonry bits for concrete).
2. Prepare the Material
Mark the Spot: Use a pencil or marker to mark the exact spot where you want to drill the hole.
Secure the Material: Clamp the material securely to a workbench or other stable surface to prevent it from moving.
3. Insert the Drill Bit
Attach the Bit: Insert the drill bit into the chuck of your drill. Ensure it is fully seated and centered.
Tighten the Chuck: Tighten the chuck securely to hold the bit in place. For keyless chucks, turn the chuck clockwise by hand. For keyed chucks, use the chuck key to tighten.

4. Set Up the Drill
Adjust the Speed: Set the drill to an appropriate speed. Start with a lower speed for harder materials and increase as needed.
Check the Angle: Ensure the drill is perpendicular to the material to create a straight hole.
5. Drill the Hole
Start Drilling: Begin drilling at a low speed to prevent the bit from slipping. Apply gentle pressure and let the bit do the work.
Clear Debris: Periodically withdraw the bit to clear out chips and debris, especially when drilling deep holes.
Monitor the Bit: Keep an eye on the bit to ensure it is cutting smoothly and not overheating.
6. Finish the Hole
Check Depth: Measure the depth of the hole periodically to ensure it meets your requirements.
Smooth Edges: If necessary, use a file or sandpaper to smooth the edges of the hole.
how do you know what drill bit to use
Choosing the right drill bit for your project is crucial for achieving the best results. Here's a detailed guide to help you determine the appropriate drill bit size and type:
1. Identify the Material
Different materials require different types of drill bits. Common materials include wood, metal, plastic, and masonry.
Wood: High-Speed Steel (HSS) or brad point bits.
Metal: HSS, cobalt, or carbide bits.
Plastic: HSS or titanium-coated bits.
Masonry: Carbide-tipped or diamond-coated bits.
2. Determine the Purpose
Pilot Holes: For screws, use a drill bit slightly smaller than the screw's shank to ensure a snug fit.
Clearance Holes: For bolts or dowels, use a drill bit that matches the diameter of the bolt or dowel.
Counterboring: For flush-mounted screws, use a countersink bit or a Forstner bit to create a flat-bottomed hole.
3. Consult a Drill Bit Size Chart
A drill bit size chart can help you match the correct bit size to your specific task. These charts are available online or in hardware stores and provide detailed information on the appropriate sizes for various applications.
4. Common Drill Bit Sizes
Here are some common drill bit sizes for different materials and applications:
For Wood:
Small Holes: 1/16 inch to 1/8 inch.
Medium Holes: 1/8 inch to 3/16 inch.
Large Holes: 3/16 inch to 1/2 inch.
For Metal:
Small Holes: 1/16 inch to 3/32 inch.
Medium Holes: 3/32 inch to 1/8 inch.
Large Holes: 1/8 inch to 1/4 inch.
For Masonry:
Small Holes: 1/8 inch to 1/4 inch.
Medium Holes: 1/4 inch to 3/8 inch.
Large Holes: 3/8 inch to 1/2 inch.
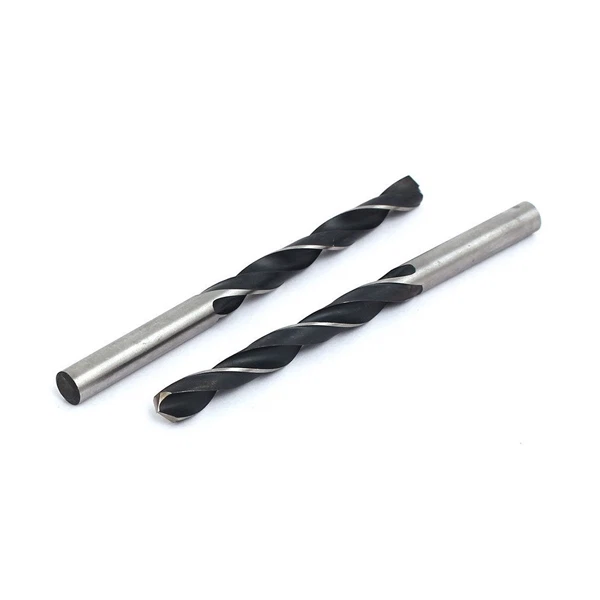
5. Use a Drill Bit Gauge
A drill bit gauge is a tool that helps you measure and identify the size of your drill bits. It can be particularly useful if you have a collection of bits and need to find the right size quickly.
6. Consider the Screw or Bolt Size
Wood Screws: Use a drill bit slightly smaller than the screw's shank. For example, for a #8 wood screw, a 5/32-inch drill bit is commonly used.
Sheet Metal Screws: Use a drill bit that matches the screw's thread size. For example, for a #8 sheet metal screw, a 3/16-inch drill bit is typically used.
Machine Screws: Use a tap drill size that corresponds to the screw's thread size. For example, for a 1/4-20 machine screw, a 21/64-inch drill bit is recommended.
7. Safety and Precision
Mark the Spot: Use a center punch or marker to mark the exact spot where you want to drill the hole. This helps guide the drill bit and ensures accuracy.
Secure the Material: Clamp the material to prevent it from moving while drilling.
Start Slow: Begin drilling at a slow speed to ensure the bit starts cutting smoothly. Apply gentle pressure to avoid damaging the material.
8. Additional Tips
Inspect the Bit: Regularly inspect your drill bits for wear or damage and replace them as needed.
Use Lubricant: When drilling metal, use cutting oil or lubricant to reduce heat and friction.
Clear Debris: Periodically retract the bit to clear out chips and debris, especially when drilling deep holes.
how do you put drill bits in
Putting a drill bit into a drill is a straightforward process, but it needs to be done correctly to ensure the bit is secure and the drill operates safely. Here's a step-by-step guide on how to insert a drill bit into a drill:
For Keyless Chucks (Most Modern Drills)
1.Prepare the Drill:
Turn Off the Drill: Ensure the drill is turned off and the battery is removed (for cordless drills) or the power cord is unplugged (for corded drills).
Secure the Drill: Place the drill in a vise or hold it firmly with one hand to prevent it from moving.
2.Loosen the Chuck:
Grip the Chuck: Firmly grip the chuck with your fingers and thumb.
Turn Counterclockwise: Rotate the chuck counterclockwise to loosen it. Apply steady pressure and turn until the chuck is fully open.
3.Insert the Drill Bit:
Align the Bit: Place the drill bit into the chuck, ensuring it is fully seated and centered. The shank (the non-cutting end) of the bit should fit snugly into the chuck.
Check Alignment: Ensure the drill bit is perpendicular to the workpiece. This is crucial for drilling a straight hole.
4.Tighten the Chuck:
Grip the Chuck: Firmly grip the chuck again.
Turn Clockwise: Rotate the chuck clockwise to tighten it. Apply steady pressure and turn until the bit is securely held in place.
5.Check the Bit:
Pull the Bit: Gently pull on the bit to ensure it is firmly in place. The bit should not move when pulled.
For Keyed Chucks (Older Drills)
1.Prepare the Drill:
Turn Off the Drill: Ensure the drill is turned off and the battery is removed (for cordless drills) or the power cord is unplugged (for corded drills).
Secure the Drill: Place the drill in a vise or hold it firmly with one hand to prevent it from moving.
2.Insert the Chuck Key:
Locate the Key: Find the chuck key that came with your drill. It is usually stored on the side of the drill or in the drill case.
Insert the Key: Insert the key into one of the holes on the side of the chuck.
3.Loosen the Chuck:
Turn Counterclockwise: Turn the chuck key counterclockwise to loosen the chuck. Apply steady pressure and turn until the chuck is fully open.
4.Insert the Drill Bit:
Align the Bit: Place the drill bit into the chuck, ensuring it is fully seated and centered. The shank (the non-cutting end) of the bit should fit snugly into the chuck.
Check Alignment: Ensure the drill bit is perpendicular to the workpiece. This is crucial for drilling a straight hole.
5.Tighten the Chuck:
Insert the Key: Insert the key into one of the holes on the side of the chuck.
Turn Clockwise: Turn the chuck key clockwise to tighten the chuck. Apply steady pressure and turn until the bit is securely held in place.
Move to Next Hole: Move the key to the next hole and repeat the process. Continue until the bit is fully tightened.
6.Check the Bit:
Pull the Bit: Gently pull on the bit to ensure it is firmly in place. The bit should not move when pulled.
how does a drill bit work
A drill bit works by rotating and cutting into a material to create a hole. The process involves several key components and principles that ensure the bit can effectively remove material and form a precise hole. Here's a detailed explanation of how a drill bit works:
Key Components of a Drill Bit
1.Shank:
Function: The shank is the part of the drill bit that fits into the drill chuck. It provides the connection between the drill and the bit.
Types: Common shank types include round shanks for standard drills and hex shanks for impact drivers.
2.Flutes:
Function: The flutes are the spiral grooves along the length of the drill bit. They help remove material from the hole as the bit rotates.
Design: The design of the flutes can vary, with some bits having more or fewer flutes depending on the intended use.
3.Cutting Edges:
Function: The cutting edges are the sharp parts at the tip of the drill bit that actually cut into the material.
Design: The angle and shape of the cutting edges can vary, with different designs optimized for different materials (e.g., wood, metal, masonry).
4.Point:
Function: The point is the very tip of the drill bit, which helps to start the hole and guide the bit into the material.
Types: Common point angles include 118 degrees for general-purpose bits and 135 degrees for more precise applications.
How a Drill Bit Works
1.Rotation:
The drill bit is attached to a power drill or hand drill, which provides rotational motion.
As the drill rotates the bit, the cutting edges engage with the material, cutting away small chips.
2.Material Removal:
The flutes on the drill bit help to lift and remove the cut material from the hole.
This continuous removal of material allows the bit to penetrate deeper into the material.
3.Penetration:
The cutting edges of the bit cut into the material, creating a hole.
The point of the bit helps to keep the bit centered and prevents it from wandering.
4.Cooling and Lubrication:
When drilling into hard materials like metal, it is often necessary to use a cutting fluid or lubricant to reduce heat and friction.
This helps to prolong the life of the bit and ensures a cleaner hole.
Tips for Effective Drilling
Secure the Material: Clamp the material to prevent it from moving while drilling.
Mark the Spot: Use a center punch or marker to mark the exact spot where you want to drill the hole. This helps guide the drill bit and ensures accuracy.
Start Slow: Begin drilling at a slow speed to ensure the bit starts cutting smoothly. Apply gentle pressure to avoid damaging the material.
Clear Debris: Periodically retract the bit to clear out chips and debris, especially when drilling deep holes.
Use Lubricant: When drilling metal, use cutting oil or lubricant to reduce heat and friction.
how hot does a drill bit get
Drill bits can get quite hot during use, primarily due to the friction generated between the bit and the material being drilled. The temperature can vary depending on several factors, including the type of material being drilled, the speed of the drill, the feed rate, and the condition of the drill bit.
Factors Affecting Drill Bit Temperature
1.Friction:
The primary cause of heat generation is friction between the drill bit and the workpiece. Harder materials, such as metals, tend to generate more heat due to increased resistance.
2.Lubrication:
Inadequate lubrication can exacerbate heat generation. Using cutting oil or drilling paste helps reduce friction and dissipate heat.
3.Condition of the Drill Bit:
Dull or damaged drill bits require more force to penetrate the material, resulting in increased friction and heat. Sharp bits cut more efficiently and generate less heat.
4.Drilling Speed and Feed Rate:
Higher drilling speeds and feed rates increase friction and heat. It's important to use appropriate speeds and feed rates for the material being drilled.
Typical Temperature Ranges
General Use: In typical drilling applications, drill bits can reach temperatures between 181.7°C (359°F) and 251.6°C (484°F).
Bone Drilling: In medical applications, such as bone drilling, temperatures can rise significantly. For instance, a new drill bit can cause a temperature increase of 7.5°C, while a heavily used bit can cause a rise of up to 25.4°C.
Tips to Manage Heat
Use Lubricants: Apply cutting oil or water to reduce friction and dissipate heat.
Control Speed and Pressure: Use moderate drilling speeds and gentle, steady pressure to minimize heat generation.
Take Breaks: Allow the drill to rest periodically to cool down, especially during prolonged drilling sessions.
Inspect Bits: Regularly check the condition of your drill bits and replace dull or damaged ones.
how it's made drill bits
Drill bits are manufactured through a meticulous process that involves several key steps to ensure they are durable, precise, and suitable for various drilling tasks. Here's a detailed overview of how drill bits are made:
1. Material Selection
The first step in manufacturing a drill bit is selecting the right material. Common materials include:
High-Speed Steel (HSS): Known for its durability and ability to withstand high temperatures.
Carbide: A compound of tungsten and carbon, known for its extreme hardness and wear resistance.
2. Preliminary Processing
Center Drilling: A hole is drilled in the center of the steel bar to ensure the center axis of the drill bit is accurate.
Cutting the Drill Face: A milling cutter is used to cut the drill face on the steel bar, forming the cutting part of the drill bit and ensuring it has the right shape and angle.
3. Heat Treatment
Heat treatment is crucial to enhance the hardness and wear resistance of the drill bit. This includes processes like quenching and tempering to ensure the drill bit can maintain stable performance during use.
4. Surface Treatment
To improve the corrosion resistance and lubricity of the drill bit, surface treatments such as plating or coating may be applied. For carbide drill bits, this involves creating a super-hard metal compound from tungsten carbide powder and other materials, which is then pressed and heated.
5. Final Shaping and Grinding
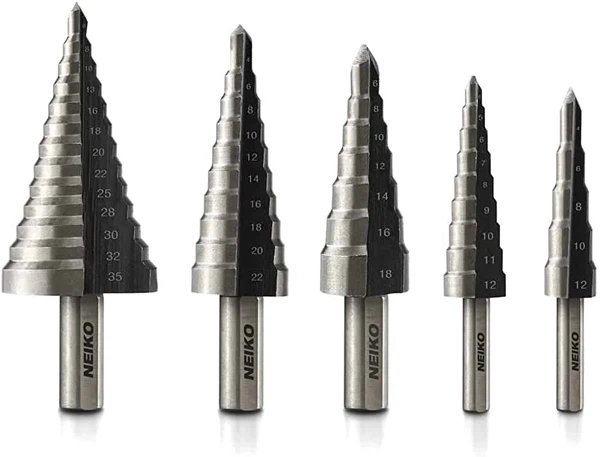
After sintering, the drill bits are shaped using diamond grinding wheels. This process creates the cutting edges and flutes, ensuring precise angles and dimensions.
6. Quality Inspection
Throughout and after the manufacturing process, drill bits undergo rigorous quality inspections to ensure they meet design requirements and performance standards.
7. Packaging and Shipment
Finally, qualified drill bits are packaged and prepared for shipment or use.
how long does a drill bit last
The lifespan of a drill bit can vary significantly based on several factors, including the type of material being drilled, the frequency of use, and how well the bit is maintained. Here's a detailed look at what you can expect:
Average Lifespan
General Use: Drill bits typically last between 30 to 100 hours of use. This range can vary depending on the specific conditions and materials.
Concrete Drill Bits: For concrete, a drill bit can last for hundreds of holes, but this depends on the bit's diameter, the depth of each hole, and the hardness of the concrete.
Factors Affecting Lifespan
1.Material Quality:
High-speed steel (HSS) bits are durable but wear down faster than carbide bits.
Carbide and cobalt bits can last up to 10 times longer than HSS bits.
2.Frequency of Use:
Bits used frequently, especially in professional settings, will wear out faster than those used occasionally.
3.Material Being Drilled:
Softer materials like wood or plastic are less harsh on drill bits, resulting in a longer lifespan.
Harder materials like metal, concrete, or tile cause quicker wear and tear.
4.Maintenance and Storage:
Regular cleaning and proper storage can significantly extend the life of a drill bit.
Keeping bits sharp and free from debris helps maintain their effectiveness.
Tips to Extend Lifespan
Use the Right Bit for the Job: Using the correct bit for each material reduces unnecessary wear.
Keep Bits Clean: Regularly clean debris from the flutes to prevent rust and maintain sharpness.
Store Properly: Store bits in a dry place to prevent rust and protect the cutting edges.
Sharpen When Necessary: Sharpening can restore cutting ability, but avoid over-sharpening.
When to Replace
Dull Edges: The cutting edge loses its sharpness.
Chips or Cracks: Small pieces missing from the bit.
Discoloration: The bit turns blue from heat.
Slower Drilling: It takes longer to make holes.
Smoke or Burning Smell: The bit is working too hard.
how long is a drill bit
The length of a drill bit can vary significantly depending on its type, intended use, and the material it is designed to drill. Here's a detailed look at the typical lengths of different types of drill bits:
1. Twist Drill Bits
General-Purpose Bits: These are the most common type of drill bits and come in various lengths. Standard lengths range from a few inches to over a foot long.
Common Lengths: 3 inches, 6 inches, 9 inches, 12 inches.
2. Brad Point Drill Bits
Woodworking Bits: Designed for precise drilling in wood, these bits are typically shorter to ensure accuracy.
Common Lengths: 2 inches, 3 inches, 4 inches.
3. Masonry Drill Bits
Concrete and Brick Bits: These bits are designed to penetrate hard materials and are often longer to reach deeper holes.
Common Lengths: 4 inches, 6 inches, 8 inches, 10 inches.
4. Tile and Glass Drill Bits
Ceramic and Glass Bits: These bits are typically shorter to ensure precision and control.
Common Lengths: 2 inches, 3 inches, 4 inches.
5. Auger Bits
Wood Bits: Used for drilling deep holes in wood, these bits are often longer.
Common Lengths: 6 inches, 9 inches, 12 inches, 18 inches.
6. Forstner Bits
Wood Bits: Designed for creating flat-bottomed holes in wood, these bits are typically shorter.
Common Lengths: 2 inches, 3 inches, 4 inches.
7. Hole Saws
Wood, Metal, and Plastic Bits: These bits are designed to cut large-diameter holes and come in various lengths.
Common Lengths: 1 inch, 2 inches, 3 inches, 4 inches.
8. Specialized Bits
Step Bits: Used for creating stepped holes, these bits are typically longer.
Common Lengths: 3 inches, 4 inches, 6 inches.
Factors Affecting Drill Bit Length
Material: The type of material being drilled can influence the required length. For example, drilling through thick concrete may require a longer bit.
Application: The specific task also determines the length. For instance, woodworking often requires shorter bits for precision, while masonry work may need longer bits for deeper holes.
Drill Type: The type of drill being used can also affect the length of the bit. For example, a hammer drill for masonry work may require longer bits.
Tips for Choosing the Right Length
Measure the Depth: Always measure the depth of the hole you need to drill and choose a bit that is long enough to reach the required depth.
Consider the Chuck: Ensure the bit length is compatible with the chuck of your drill. Some drills may have limitations on the length of bits they can accommodate.
Safety First: Longer bits can be more challenging to control, so ensure you have a secure grip and maintain stability while drilling.


