


Measuring the size of a drill bit accurately is crucial for ensuring the correct fit and performance in your drilling projects. Here's a step-by-step guide on how to measure drill bit size:
Tools You'll Need
Digital Caliper or Micrometer: For precise measurements.
Ruler or Tape Measure: For general measurements.
Drill Bit Gauge: A tool specifically designed for measuring drill bit sizes.
Step-by-Step Guide
1. Identify the Measurement Type
Diameter: The most common measurement for drill bits.
Length: Sometimes important for specific applications.
2. Use a Digital Caliper or Micrometer
Caliper: Place the drill bit between the jaws of the caliper and close the jaws until they snugly hold the bit. Read the measurement on the digital display.
Micrometer: Place the drill bit between the anvil and spindle of the micrometer. Turn the thimble until the bit is firmly held. Read the measurement on the scale.
3. Measure the Diameter
Hold the Bit: Hold the drill bit by its shank (the non-cutting end) to avoid damaging the cutting edges.
Place in Caliper: Place the bit between the jaws of the caliper or micrometer.
Read the Measurement: Ensure the jaws are snug against the bit and read the measurement on the digital display or scale.

4. Measure the Length (if needed)
Hold the Bit: Hold the drill bit by its shank.
Place Against Ruler: Align the end of the bit with the zero mark on a ruler or tape measure.
Read the Measurement: Measure from the tip of the bit to the end of the shank.
5. Use a Drill Bit Gauge
Insert the Bit: Insert the drill bit into the gauge until it fits snugly into one of the holes.
Read the Size: The size of the hole that fits the bit snugly is the size of the drill bit.
how to remove a broken drill bit
Removing a broken drill bit can be challenging, but with the right tools and techniques, you can successfully extract it without causing further damage. Here are several effective methods to remove a broken drill bit:
1. Using Pliers
If the broken bit is protruding from the surface, you can use pliers to grip and remove it:
Tools Needed: Needle-nose pliers or locking pliers.
Steps:
Secure the workpiece to prevent movement.
Grip the broken bit firmly with the pliers.
Rotate the bit counterclockwise to unscrew it.
Apply gentle pressure to avoid breaking the bit further.
2. Using a Drill Bit Extractor
A drill bit extractor is a specialized tool designed to remove broken bits:
Tools Needed: Drill bit extractor, center punch, hammer.
Steps:
Create a small indentation on the broken bit using a center punch.
Insert the extractor into the indentation and attach it to a T-handle.
Rotate the extractor counterclockwise to grip and unscrew the broken bit.
3. Drilling Around the Broken Bit
If the bit is deeply embedded, you may need to drill around it:
Tools Needed: Smaller drill bit, hammer, center punch.
Steps:
Use a smaller drill bit to create holes around the broken bit.
Tap the bit with a hammer and center punch to loosen it.
Once loosened, use pliers or a magnet to extract the bit.
4. Using Heat
Thermal expansion can help loosen a stuck drill bit:
Tools Needed: Heat gun or torch.
Steps:
Apply heat to the metal surrounding the broken bit.
Once the metal expands, use pliers or an extractor to remove the bit.

5. Using a Magnet
If the broken bit is made of ferrous material, a strong magnet can help:
Tools Needed: Strong magnet.
Steps:
Hold the magnet close to the broken bit and gently move it to draw the bit out.
6. Using a Reverse Drill Bit
Reverse drill bits are designed to grip and extract broken bits:
Tools Needed: Reverse drill bit, left-hand drill.
Steps:
Insert the reverse drill bit into the hole, aligning it with the broken bit.
Apply gentle pressure and rotate the bit clockwise to grip and extract the broken bit.
7. Using a Hammer and Punch
For bits that are flush with the surface:
Tools Needed: Center punch, hammer.
Steps:
Create a small indentation in the broken bit with a center punch.
Tap the punch with a hammer to rotate the bit counterclockwise.
how to sharpen a forstner drill bit
Sharpening a Forstner drill bit can be done using various methods and tools. Here's a detailed guide based on recent information:
Tools Needed
Round File: For sharpening the cutting rim.
Triangular File: For sharpening the teeth and the center spur.
Diamond Hone or Slip Stone: For honing the edges.
Vise: To securely hold the bit.
Safety Glasses: To protect your eyes from debris.

Step-by-Step Guide
1. Prepare the Bit
Clean the Bit: Ensure the Forstner bit is clean and free of debris.
Inspect for Damage: Check for any chips or uneven wear.
2. Sharpen the Cutting Rim
Use a Round File: Chuck the bit in a drill press and use a round file to hone the interior of the rim.
Match the Angle: Hold the file at the same angle as the interior of the rim and make a few quick strokes.
3. Sharpen the Teeth
Clamp the Bit: Secure the bit in a vise.
Use a Triangular File: Hone the back of each tooth with a triangular file.
Light Strokes: Use light strokes to avoid over-sharpening.
4. Hone the Chipper Edges
Use a Diamond Hone: Hone the leading edge of the chippers with a fine mini-hone.
Ensure a Flat Plane: Maintain a flat plane and a sharp cutting edge.
Focus on the Intersection: Pay close attention to where the chipper meets the cutting rim.
5. Sharpen the Center Spur
Use a Triangular File: Hone the center spur using the triangular file.
Protect the Chipper: Use your thumb as a guide to protect the chippers and rim.
Even Strokes: Use the same number of light strokes on each face to keep the point centered.
how to take out drill bit
Taking out a drill bit is a straightforward process, but the exact steps depend on the type of chuck (the part that holds the drill bit) your drill has. Here's a detailed guide for removing a drill bit from the three most common types of chucks: keyed, keyless, and quick-change.
For a Keyed Chuck:
1.Unplug the Drill:
Always unplug the drill or remove the battery to prevent accidental activation.
2.Locate the Chuck Key:
The chuck key is usually stored on the side of the drill or in a compartment on the drill case.
3.Loosen the Chuck:
Insert the key into one of the holes on the chuck.
Turn the key counterclockwise to loosen the chuck. You should feel the chuck getting looser as you turn the key.
4.Remove the Drill Bit:
Once the chuck is loose, pull out the drill bit. It might be a bit tight, so you may need to wiggle it gently.
For a Keyless Chuck:
1.Unplug the Drill:
Always unplug the drill or remove the battery to prevent accidental activation.
2.Loosen the Chuck:
Grip the collar or sleeve on the chuck and turn it counterclockwise to loosen the chuck.
3.Remove the Drill Bit:
Once the chuck is loose, pull out the drill bit. It should come out easily.
For a Quick-Change Chuck:
1.Unplug the Drill:
Always unplug the drill or remove the battery to prevent accidental activation.
2.Press the Release Button:
Quick-change chucks usually have a button or lever that you press to release the bit.
3.Remove the Drill Bit:
Pull out the old bit. It should come out easily once the release button is pressed.

Additional Tips:
Safety First: Always unplug the drill or remove the battery before changing bits.
Store the Chuck Key Safely: If you have a keyed chuck, keep the key in a safe place. Losing it can make it difficult to change bits.
Keep the Chuck Clean: Over time, debris can build up in the chuck. Clean it out periodically to ensure smooth operation.
how to tighten drill bit
Tightening a drill bit securely in the chuck is essential for efficient drilling and to prevent the bit from slipping or coming loose during operation. The process for tightening a drill bit depends on the type of chuck your drill has: keyed, keyless, or quick-change. Here's a detailed guide for each type:
For a Keyed Chuck:
1.Insert the Bit:
Place the drill bit into the chuck, ensuring it is centered and aligned properly.
2.Insert the Chuck Key:
Locate the chuck key, which is usually stored on the side of the drill or in a compartment.
Insert the key into one of the holes on the chuck.
3.Tighten the Chuck:
Turn the key clockwise to tighten the chuck around the drill bit. Apply steady pressure to ensure the bit is securely held.
Check that the bit is snug and does not move when you try to turn it by hand.
4.Remove the Key:
Once the bit is securely tightened, remove the key and store it in a safe place.
For a Keyless Chuck:
1.Insert the Bit:
Place the drill bit into the chuck, ensuring it is centered and aligned properly.
2.Tighten the Chuck:
Grip the collar or sleeve on the chuck and turn it clockwise to tighten the chuck around the drill bit. Apply steady pressure to ensure the bit is securely held.
Check that the bit is snug and does not move when you try to turn it by hand.
3.Secure the Bit:
Some keyless chucks have a locking mechanism. If yours does, engage it to ensure the bit stays in place during drilling.
For a Quick-Change Chuck:
1.Insert the Bit:
Place the drill bit into the chuck, ensuring it is centered and aligned properly.
2.Secure the Bit:
Press the release button or lever on the chuck to secure the bit. The bit should click into place and be held securely.
3.Check the Bit:
Ensure the bit is snug and does not move when you try to turn it by hand.
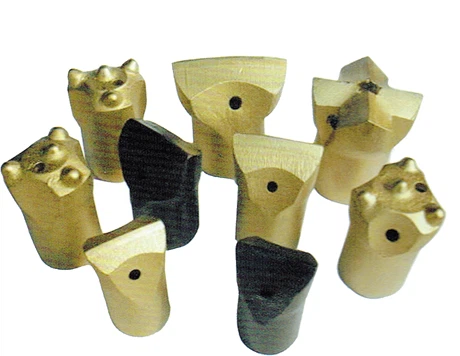
Additional Tips for Tightening a Drill Bit:
Check Bit Alignment: Ensure the drill bit is centered and aligned properly before tightening. Misaligned bits can cause uneven drilling and may damage the bit or the material.
Avoid Over-Tightening: While the bit should be snug, avoid over-tightening the chuck, as this can damage the bit or the chuck.
Test the Bit: After tightening, give the drill a quick test to ensure the bit is spinning smoothly and securely.
Keep the Chuck Clean: Debris in the chuck can affect the grip on the bit. Clean the chuck periodically to ensure smooth operation.
Store the Key Safely: If you have a keyed chuck, keep the key in a safe place to avoid losing it.
how to tighten drill bit
Tightening a drill bit securely in the chuck is essential for efficient drilling and to prevent the bit from slipping or coming loose during operation. The process for tightening a drill bit depends on the type of chuck your drill has: keyed, keyless, or quick-change. Here's a detailed guide for each type:
For a Keyed Chuck:
1.Insert the Bit:
Place the drill bit into the chuck, ensuring it is centered and aligned properly.
2.Insert the Chuck Key:
Locate the chuck key, which is usually stored on the side of the drill or in a compartment.
Insert the key into one of the holes on the chuck.
3.Tighten the Chuck:
Turn the key clockwise to tighten the chuck around the drill bit. Apply steady pressure to ensure the bit is securely held.
Check that the bit is snug and does not move when you try to turn it by hand.
4.Remove the Key:
Once the bit is securely tightened, remove the key and store it in a safe place.
For a Keyless Chuck:
1.Insert the Bit:
Place the drill bit into the chuck, ensuring it is centered and aligned properly.
2.Tighten the Chuck:
Grip the collar or sleeve on the chuck and turn it clockwise to tighten the chuck around the drill bit. Apply steady pressure to ensure the bit is securely held.
Check that the bit is snug and does not move when you try to turn it by hand.
2.Secure the Bit:
Some keyless chucks have a locking mechanism. If yours does, engage it to ensure the bit stays in place during drilling.
For a Quick-Change Chuck:
1.Insert the Bit:
Place the drill bit into the chuck, ensuring it is centered and aligned properly.
2.Secure the Bit:
Press the release button or lever on the chuck to secure the bit. The bit should click into place and be held securely.
3.Check the Bit:
Ensure the bit is snug and does not move when you try to turn it by hand.

Additional Tips for Tightening a Drill Bit:
Check Bit Alignment: Ensure the drill bit is centered and aligned properly before tightening. Misaligned bits can cause uneven drilling and may damage the bit or the material.
Avoid Over-Tightening: While the bit should be snug, avoid over-tightening the chuck, as this can damage the bit or the chuck.
Test the Bit: After tightening, give the drill a quick test to ensure the bit is spinning smoothly and securely.
Keep the Chuck Clean: Debris in the chuck can affect the grip on the bit. Clean the chuck periodically to ensure smooth operation.
Store the Key Safely: If you have a keyed chuck, keep the key in a safe place to avoid losing it.
how to tell drill bit size
Determining the size of a drill bit is crucial for ensuring the correct fit and performance in your drilling projects. Here's a comprehensive guide on how to identify the size of a drill bit:
Step-by-Step Guide
1. Visual Inspection
Check the Bit: Look for any markings on the drill bit. Many bits have their size printed or etched on the shank (the non-cutting end).
2. Use a Caliper or Micrometer
Digital Caliper: Place the drill bit between the jaws of a digital caliper and close the jaws until they snugly hold the bit. Read the measurement on the digital display.
Micrometer: Place the drill bit between the anvil and spindle of the micrometer. Turn the thimble until the bit is firmly held. Read the measurement on the scale.
3. Measure the Diameter
Hold the Bit: Hold the drill bit by its shank (the non-cutting end) to avoid damaging the cutting edges.
Place in Caliper: Place the bit between the jaws of the caliper or micrometer.
Read the Measurement: Ensure the jaws are snug against the bit and read the measurement on the digital display or scale.
4. Use a Drill Bit Gauge
Insert the Bit: Insert the drill bit into the gauge until it fits snugly into one of the holes.
Read the Size: The size of the hole that fits the bit snugly is the size of the drill bit.

Common Drill Bit Sizes and Their Uses
Fractional Sizes: Common sizes include 1/16 inch, 1/8 inch, 3/16 inch, 1/4 inch, 5/16 inch, 3/8 inch, 7/16 inch, 1/2 inch, 9/16 inch, 5/8 inch, 11/16 inch, 3/4 inch, 13/16 inch, 7/8 inch, 15/16 inch, and 1 inch.
Decimal Sizes: Common decimal sizes include 0.0135 inches (1/72 inch), 0.0197 inches (1/50 inch), 0.0236 inches (3/128 inch), 0.0313 inches (1/32 inch), 0.0354 inches (9/256 inch), 0.0394 inches (5/128 inch), 0.0469 inches (3/64 inch), 0.0512 inches (13/256 inch), 0.0551 inches (7/128 inch), 0.0591 inches (9/160 inch), 0.0625 inches (1/16 inch), 0.0669 inches (17/256 inch), 0.0709 inches (9/128 inch), 0.0748 inches (19/256 inch), 0.0787 inches (5/64 inch), 0.0827 inches (21/256 inch), 0.0866 inches (11/128 inch), 0.0906 inches (23/256 inch), 0.0938 inches (3/32 inch), 0.0976 inches (25/256 inch), 0.1016 inches (13/128 inch), 0.1055 inches (27/256 inch), 0.1094 inches (7/64 inch), 0.1133 inches (29/256 inch), 0.1173 inches (15/128 inch), 0.1217 inches (31/256 inch), 0.125 inches (1/8 inch), 0.1289 inches (33/256 inch), 0.1331 inches (17/128 inch), 0.137 inches (35/256 inch), 0.141 inches (9/64 inch), 0.1449 inches (37/256 inch), 0.1488 inches (19/128 inch), 0.1528 inches (39/256 inch), 0.1563 inches (5/32 inch), 0.16 inches (41/256 inch), 0.1638 inches (21/128 inch), 0.1677 inches (43/256 inch), 0.1717 inches (11/64 inch), 0.1756 inches (45/256 inch), 0.1795 inches (23/128 inch), 0.1835 inches (47/256 inch), 0.1875 inches (3/16 inch), 0.1914 inches (49/256 inch), 0.1953 inches (25/128 inch), 0.1992 inches (51/256 inch), 0.2031 inches (13/64 inch), 0.207 inches (53/256 inch), 0.2109 inches (27/128 inch), 0.2148 inches (55/256 inch), 0.2188 inches (7/32 inch), 0.2227 inches (57/256 inch), 0.2266 inches (29/128 inch), 0.2305 inches (59/256 inch), 0.2344 inches (15/64 inch), 0.2383 inches (61/256 inch), 0.2422 inches (31/128 inch), 0.2461 inches (63/256 inch), 0.25 inches (1/4 inch), 0.2539 inches (65/256 inch), 0.2578 inches (33/128 inch), 0.2617 inches (67/256 inch), 0.2656 inches (17/64 inch), 0.2695 inches (69/256 inch), 0.2734 inches (35/128 inch), 0.2773 inches (71/256 inch), 0.2813 inches (9/32 inch), 0.2852 inches (73/256 inch), 0.2891 inches (37/128 inch), 0.293 inches (75/256 inch), 0.2969 inches (19/64 inch), 0.3008 inches (77/256 inch), 0.3047 inches (39/128 inch), 0.3086 inches (79/256 inch), 0.3125 inches (5/16 inch), 0.3164 inches (81/256 inch), 0.3203 inches (41/128 inch), 0.3242 inches (83/256 inch), 0.3281 inches (21/64 inch), 0.332 inches (85/256 inch), 0.3359 inches (43/128 inch), 0.3398 inches (87/256 inch), 0.3438 inches (11/32 inch), 0.3477 inches (89/256 inch), 0.3516 inches (45/128 inch), 0.3555 inches (91/256 inch), 0.3594 inches (23/64 inch), 0.3633 inches (93/256 inch), 0.3672 inches (47/128 inch), 0.3711 inches (95/256 inch), 0.375 inches (3/8 inch), 0.3789 inches (97/256 inch), 0.3828 inches (49/128 inch), 0.3867 inches (99/256 inch), 0.3906 inches (25/64 inch), 0.3945 inches (101/256 inch), 0.3984 inches (51/128 inch), 0.4023 inches (103/256 inch), 0.4063 inches (13/32 inch), 0.4102 inches (105/256 inch), 0.4141 inches (53/128 inch), 0.418 inches (107/256 inch), 0.4219 inches (27/64 inch), 0.4258 inches (109/256 inch), 0.4297 inches (55/128 inch), 0.4336 inches (111/256 inch), 0.4375 inches (7/16 inch), 0.4414 inches (113/256 inch), 0.4453 inches (57/128 inch), 0.4492 inches (115/256 inch), 0.4531 inches (29/64 inch), 0.457 inches (117/256 inch), 0.4609 inches (59/128 inch), 0.4648 inches (119/256 inch), 0.4688 inches (15/32 inch), 0.4727 inches (121/256 inch), 0.4766 inches (61/128 inch), 0.4805 inches (123/256 inch), 0.4844 inches (31/64 inch), 0.4883 inches (125/256 inch), 0.4922 inches (63/128 inch), 0.4961 inches (127/256 inch), 0.5 inches (1/2 inch), 0.5039 inches (129/256 inch), 0.5078 inches (65/128 inch), 0.5117 inches (131/256 inch), 0.5156 inches (21/64 inch), 0.5195 inches (133/256 inch), 0.5234 inches (67/128 inch), 0.5273 inches (135/256 inch), 0.5313 inches (9/16 inch), 0.5352 inches (137/256 inch), 0.5391 inches (69/128 inch), 0.543 inches (139/256 inch), 0.5469 inches (23/64 inch), 0.5508 inches (141/256 inch), 0.5547 inches (71/128 inch), 0.5586 inches (143/256 inch), 0.5625 inches (5/8 inch), 0.5664 inches (145/256 inch), 0.5703 inches (73/128 inch), 0.5742 inches (147/256 inch), 0.5781 inches (29/64 inch), 0.582 inches (149/256 inch), 0.5859 inches (75/128 inch), 0.5898 inches (151/256 inch), 0.5938 inches (3/5 inch), 0.5977 inches (153/256 inch), 0.6016 inches (77/128 inch), 0.6055 inches (155/256 inch), 0.6094 inches (31/64 inch), 0.6133 inches (157/256 inch), 0.6172 inches (79/128 inch), 0.6211 inches (159/256 inch), 0.625 inches (5/8 inch), 0.6289 inches (161/256 inch), 0.6328 inches (81/128 inch), 0.6367 inches (163/256 inch), 0.6406 inches (33/64 inch), 0.6445 inches (165/256 inch), 0.6484 inches (83/128 inch), 0.6523 inches (167/256 inch), 0.6563 inches (11/16 inch), 0.6602 inches (169/256 inch), 0.6641 inches (85/128 inch), 0.668 inches (171/256 inch), 0.6719 inches (35/64 inch), 0.6758 inches (173/256 inch), 0.6797 inches (87/128 inch), 0.6836 inches (175/256 inch), 0.6875 inches (7/8 inch), 0.6914 inches (177/256 inch), 0.6953 inches (89/128 inch), 0.6992 inches (179/256 inch), 0.7031 inches (37/64 inch), 0.707 inches (181/256 inch), 0.7109 inches (91/128 inch), 0.7148 inches (183/256 inch), 0.7188 inches (15/32 inch), 0.7227 inches (185/256 inch), 0.7266 inches (93/128 inch), 0.7305 inches (187/256 inch), 0.7344 inches (39/64 inch), 0.7383 inches (189/256 inch), 0.7422 inches (95/128 inch), 0.7461 inches (191/256 inch), 0.75 inches (3/4 inch), 0.7539 inches (193/256 inch), 0.7578 inches (97/128 inch), 0.7617 inches (195/256 inch), 0.7656 inches (41/64 inch), 0.7695 inches (197/256 inch), 0.7734 inches (99/128 inch), 0.7773 inches (199/256 inch), 0.7813 inches (13/16 inch), 0.7852 inches (201/256 inch), 0.7891 inches (101/128 inch), 0.793 inches (203/256 inch), 0.7969 inches (43/64 inch), 0.8008 inches (205/256 inch), 0.8047 inches (103/128 inch), 0.8086 inches (207/256 inch), 0.8125 inches (5/6 inch), 0.8164 inches (209/256 inch), 0.8203 inches (105/128 inch), 0.8242 inches (211/256 inch), 0.8281 inches (45/64 inch), 0.832 inches (213/256 inch), 0.8359 inches (107/128 inch), 0.8398 inches (215/256 inch), 0.8438 inches (7/8 inch), 0.8477 inches (217/256 inch), 0.8516 inches (109/128 inch), 0.8555 inches (219/256 inch), 0.8594 inches (47/64 inch), 0.8633 inches (221/256 inch), 0.8672 inches (111/128 inch), 0.8711 inches (223/256 inch), 0.875 inches (7/8 inch), 0.8789 inches (225/256 inch), 0.8828 inches (113/128 inch), 0.8867 inches (227/256 inch), 0.8906 inches (49/64 inch), 0.8945 inches (229/256 inch), 0.8984 inches (115/128 inch), 0.9023 inches (231/256 inch), 0.9063 inches (15/16 inch), 0.9102 inches (233/256 inch), 0.9141 inches (117/128 inch), 0.918 inches (235/256 inch), 0.9219 inches (51/64 inch), 0.9258 inches (237/256 inch), 0.9297 inches (119/128 inch), 0.9336 inches (239/256 inch), 0.9375 inches (3/4 inch), 0.9414 inches (241/256 inch), 0.9453 inches (121/128 inch), 0.9492 inches (243/256 inch), 0.9531 inches (53/64 inch), 0.957 inches (245/256 inch), 0.9609 inches (123/128 inch), 0.9648 inches (247/256 inch), 0.9688 inches (19/32 inch), 0.9727 inches (249/256 inch), 0.9766 inches (125/128 inch), 0.9805 inches (251/256 inch), 0.9844 inches (55/64 inch), 0.9883 inches (253/256 inch), 0.9922 inches (127/128 inch), 0.9961 inches (255/256 inch), 1 inch (1 inch).
Tips for Accurate Measurement
Clean the Bit: Ensure the drill bit is clean and free of debris before measuring.
Use the Right Tools: Digital calipers or micrometers provide the most accurate measurements.
Check Manufacturer's Specifications: If possible, refer to the manufacturer's specifications for the drill bit size.


