Changing a drill bit is a straightforward process, but the exact steps depend on the type of chuck (the part that holds the drill bit) your drill has. Here's a detailed guide for changing a drill bit in the three most common types of chucks: keyed, keyless, and quick-change.
For a Keyed Chuck:
1.Unplug the Drill:
Always unplug the drill or remove the battery to prevent accidental activation.
2.Locate the Chuck Key:
The chuck key is usually stored on the side of the drill or in a compartment on the drill case.
3.Loosen the Chuck:
Insert the key into one of the holes on the chuck.
Turn the key counterclockwise to loosen the chuck. You should feel the chuck getting looser as you turn the key.
4.Remove the Old Drill Bit:
Once the chuck is loose, pull out the old drill bit. It might be a bit tight, so you may need to wiggle it gently.
5.Insert the New Drill Bit:
Place the new drill bit into the chuck. Ensure it is centered and aligned properly.
6.Tighten the Chuck:
Use the chuck key again, but this time turn it clockwise to tighten the chuck around the new drill bit. Make sure it is snug and secure.
7.Test the Bit:
Plug in the drill or insert the battery, and give it a quick test to ensure the bit is spinning properly and not wobbling.
For a Keyless Chuck:
1.Unplug the Drill:
Always unplug the drill or remove the battery to prevent accidental activation.
2.Loosen the Chuck:
Grip the collar or sleeve on the chuck and turn it counterclockwise to loosen the chuck.
3.Remove the Old Drill Bit:
Once the chuck is loose, pull out the old drill bit. It should come out easily.
4.Insert the New Drill Bit:
Place the new drill bit into the chuck, making sure it is centered.
5.Tighten the Chuck:
Twist the collar clockwise to tighten the chuck around the new drill bit. You may need to apply some force to get it tight enough.
6.Test the Bit:
Plug in the drill or insert the battery and give it a quick test to ensure the bit is secure and spinning smoothly.
For a Quick-Change Chuck:
1.Unplug the Drill:
Always unplug the drill or remove the battery to prevent accidental activation.
2.Press the Release Button:
Quick-change chucks usually have a button or lever that you press to release the bit.
3.Remove the Old Drill Bit:
Pull out the old bit. It should come out easily once the release button is pressed.
4.Insert the New Drill Bit:
Push the new bit into the holder until it clicks into place.
5.Test the Bit:
Plug in the drill or insert the battery and give it a quick test to ensure the bit is secure and spinning smoothly.
how big of a drill bit to use
Choosing the right size drill bit depends on several factors, including the material you are drilling into, the type of hole you need, and the specific application. Here's a detailed guide on how to select the appropriate drill bit size:
1. Determine the Purpose of the Hole
Pilot Holes: For screws or dowels, use a drill bit slightly smaller than the diameter of the screw or dowel.
Clearance Holes: For bolts or fasteners, use a drill bit that matches the diameter of the bolt.
Counterbored Holes: For flush-mounted screws or bolts, use a counterbore bit to create a recessed hole.
2. Material Considerations
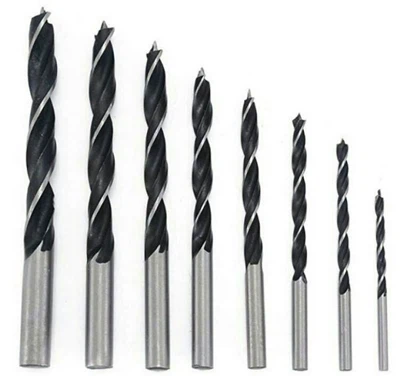
Wood: Use bits designed for wood, such as brad point bits or twist bits. For example, a 1/8-inch bit is suitable for small pilot holes, while a 1/4-inch bit is good for larger screws.
Metal: Use high-speed steel (HSS) or cobalt bits. For example, a 3/16-inch bit is suitable for drilling through thin metal sheets.
Masonry: Use carbide-tipped masonry bits. For example, a 1/2-inch bit is suitable for drilling large holes in concrete or brick.
3. Check the Specifications
Thread Size: For tapping threads, use a drill bit that matches the tap size. For example, a #21 drill bit is suitable for a 10-32 tap.
Anchor Size: For masonry anchors, use a drill bit that matches the anchor size. For example, a 3/16-inch bit is suitable for a 3/16-inch anchor.
4. Common Drill Bit Sizes
Wood: Common sizes include 1/16-inch, 1/8-inch, 3/16-inch, 1/4-inch, 5/16-inch, 3/8-inch, 7/16-inch, 1/2-inch.
Metal: Common sizes include 1/16-inch, 1/8-inch, 3/16-inch, 1/4-inch, 5/16-inch, 3/8-inch, 7/16-inch, 1/2-inch.
Masonry: Common sizes include 1/8-inch, 1/4-inch, 3/8-inch, 1/2-inch, 5/8-inch, 3/4-inch.
5. Measure Accurately
Use a Caliper: For precise measurements, use a caliper to measure the diameter of the drill bit.
Check the Bit Size: Most drill bits have the size marked on the shank. Ensure the size matches your requirements.
6. Safety and Precision
Secure the Drill Bit: Ensure the drill bit is securely tightened in the chuck to prevent slipping.
Drill Slowly: Start drilling at a low speed to prevent the bit from wandering. Apply steady pressure and let the bit do the work.
Example Scenarios
Woodworking: For a 1/4-inch dowel, use a 1/4-inch drill bit to create a pilot hole.
Metalworking: For a 3/8-inch bolt, use a 3/8-inch drill bit to create a clearance hole.
Masonry: For a 1/2-inch anchor, use a 1/2-inch carbide-tipped masonry bit to drill the hole.
how do flexible drill bits work
Flexible drill bits are specialized tools designed to navigate tight spaces and obstacles, making them ideal for drilling through walls, ceilings, or other hard-to-reach areas. Here's how they work and how to use them effectively:
How Flexible Drill Bits Work
Flexible drill bits feature a bendable shaft that allows them to navigate around hidden pipes, electrical wires, and structural supports without causing damage. This flexibility is achieved through a unique design that incorporates a series of small, interlocking sections. The bits are typically made of high-quality steel and can be used with a standard electric drill.
Using Flexible Drill Bits
Select the Right Bit: Choose a flexible drill bit based on the material you are drilling into and the size of the hole you need. For wood-framed walls, auger-style bits are recommended, while masonry or concrete requires bits with carbide tips.
Attach the Bit: Securely attach the flexible drill bit to your drill. Ensure it is aligned properly to avoid any wobbling or misalignment.
Drill Slowly: Start drilling at a low speed and apply gentle pressure. Allow the bit to navigate around obstacles smoothly. For drywall, start with low speed and gradual pressure; for plaster, create a small pilot hole first to prevent cracking.
Monitor the Process: Carefully monitor the drilling process to avoid excessive bending or twisting of the flexible bit. Clear chips frequently by withdrawing the bit from the hole.
Safety Precautions: Always wear protective gear, including safety glasses and gloves. Use a stud finder to locate hidden wires and pipes before drilling.
Tips for Effective Use
Material Compatibility: Flexible drill bits can drill through wood, plastic, drywall, and some metals. For harder materials like concrete, use a hammer drill or impact driver.
Length and Control: Longer bits provide greater reach but may be harder to control. Choose the appropriate length based on your specific needs.
Sharpening: Keep your flexible drill bits sharp for optimal performance. Dull bits require more pressure, which can cause them to heat up and wear out faster.
how do i identify a masonry drill bit
To identify a masonry drill bit, look for the following key features:
1.Fluted or Spiral Design: Masonry drill bits typically have flutes or spirals running along the length of the bit. This design helps to remove debris and reduce friction while drilling.
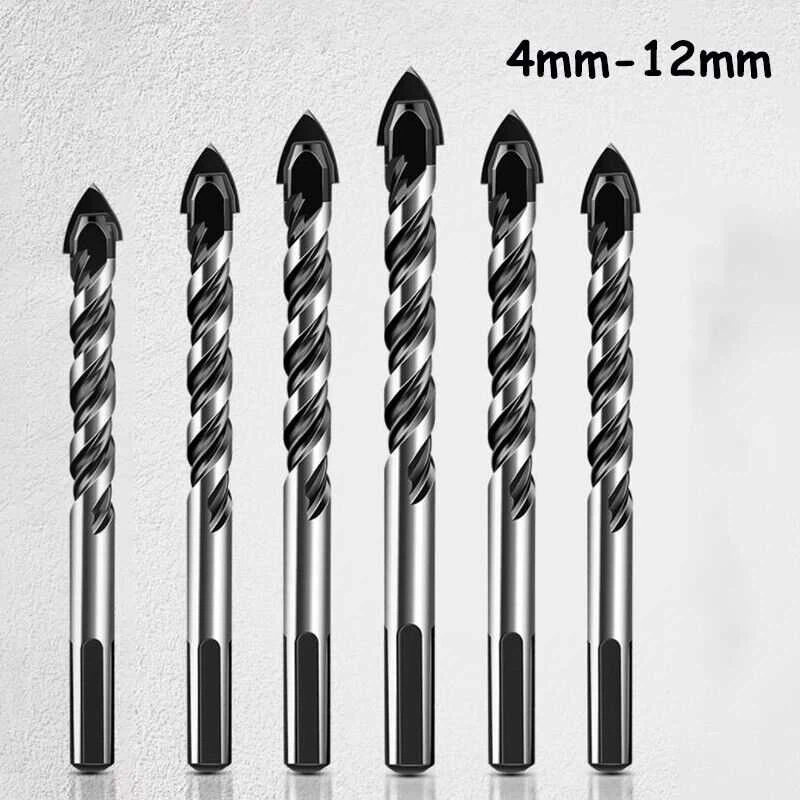
2.Hardened Tip: The tip of a masonry drill bit is usually made of a hardened material like tungsten carbide. This tip is often silver or gray in color and is much harder than the rest of the drill bit.
3.Tapered Bit: The bit is slightly shorter than the flutes, and the end is wider to ensure deeper penetration and prevent the bit from getting stuck.

4.Color: Masonry drill bits are often black or copper in color due to special coatings that enhance durability and heat resistance.
5.Markings: Check the shank of the bit for engraved markings that indicate the size and type. Look for labels such as "masonry," "concrete," or "brick" to confirm its intended use
how do i know the size of my drill bit
Determining the size of your drill bit is crucial for ensuring the right fit and performance. Here's a step-by-step guide on how to measure and identify the size of your drill bit:
Step-by-Step Guide
1. Visual Inspection
Check for Markings: Many drill bits have their size marked on the shank. Look for numbers or letters that indicate the diameter of the bit.
Common Sizes: Standard sizes include 1/16 inch, 1/8 inch, 3/16 inch, 1/4 inch, 5/16 inch, 3/8 inch, 7/16 inch, and 1/2 inch.
2. Use a Caliper
Digital or Dial Caliper: These tools provide precise measurements. Place the drill bit between the jaws of the caliper and read the measurement displayed.
Steps:
Open the caliper jaws.
Insert the drill bit between the jaws.
Close the jaws gently until they make contact with the bit.
Read the measurement on the caliper display.
3. Use a Drill Bit Gauge
Drill Bit Gauge: This is a simple tool with holes of various sizes. Insert the drill bit into the holes until it fits snugly. The size of the hole that fits the bit is the diameter of the drill bit.
4. Measure with a Ruler or Tape Measure
Ruler or Tape Measure: For a less precise measurement, use a ruler or tape measure to measure the diameter of the drill bit.
Steps:
Lay the drill bit flat on a surface.
Measure the diameter at the cutting end of the bit.
Tips for Accurate Measurement
Clean the Bit: Ensure the drill bit is clean and free of debris before measuring.
Measure at the Cutting Edge: Always measure the diameter at the cutting end of the bit, not the shank.
Double-Check: Measure the bit multiple times to ensure accuracy.
Common Drill Bit Sizes
Fractional Inches: 1/16", 1/8", 3/16", 1/4", 5/16", 3/8", 7/16", 1/2"
Decimal Inches: 0.0625", 0.125", 0.1875", 0.250", 0.3125", 0.375", 0.4375", 0.500"
Metric Sizes: 1.0 mm, 2.0 mm, 3.0 mm, 4.0 mm, 5.0 mm, 6.0 mm, 7.0 mm, 8.0 mm
how do i know what drill bit size to use
Choosing the right drill bit size is crucial for achieving the best results in your project. Here's a detailed guide to help you determine the appropriate drill bit size:
1. Identify the Material
Different materials require different drill bit sizes and types. Common materials include wood, metal, plastic, and masonry.
2. Determine the Purpose
Pilot Holes: For screws, use a drill bit slightly smaller than the screw's shank to ensure a snug fit.
Clearance Holes: For bolts or dowels, use a drill bit that matches the diameter of the bolt or dowel.
Counterboring: For flush-mounted screws, use a countersink bit or a Forstner bit to create a flat-bottomed hole.
3. Consult a Drill Bit Size Chart
A drill bit size chart can help you match the correct bit size to your specific task. These charts are available online or in hardware stores and provide detailed information on the appropriate sizes for various applications.
4. Common Drill Bit Sizes
Here are some common drill bit sizes for different materials and applications:
For Wood:
Small Holes: 1/16 inch to 1/8 inch.
Medium Holes: 1/8 inch to 3/16 inch.
Large Holes: 3/16 inch to 1/2 inch.
For Metal:
Small Holes: 1/16 inch to 3/32 inch.
Medium Holes: 3/32 inch to 1/8 inch.
Large Holes: 1/8 inch to 1/4 inch.
For Masonry:
Small Holes: 1/8 inch to 1/4 inch.
Medium Holes: 1/4 inch to 3/8 inch.
Large Holes: 3/8 inch to 1/2 inch.
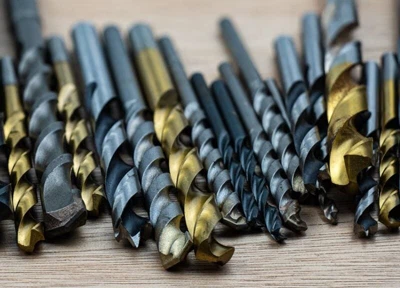
5. Use a Drill Bit Gauge
A drill bit gauge is a tool that helps you measure and identify the size of your drill bits. It can be particularly useful if you have a collection of bits and need to find the right size quickly.
6. Consider the Screw or Bolt Size
Wood Screws: Use a drill bit slightly smaller than the screw's shank. For example, for a #8 wood screw, a 5/32-inch drill bit is commonly used.
Sheet Metal Screws: Use a drill bit that matches the screw's thread size. For example, for a #8 sheet metal screw, a 3/16-inch drill bit is typically used.
Machine Screws: Use a tap drill size that corresponds to the screw's thread size. For example, for a 1/4-20 machine screw, a 21/64-inch drill bit is recommended.
7. Safety and Precision
Mark the Spot: Use a center punch or marker to mark the exact spot where you want to drill the hole. This helps guide the drill bit and ensures accuracy.
Secure the Material: Clamp the material to prevent it from moving while drilling.
Start Slow: Begin drilling at a slow speed to ensure the bit starts cutting smoothly. Apply gentle pressure to avoid damaging the material.
how do i remove a drill bit
Removing a drill bit is a straightforward process, but it requires the right technique to ensure the bit is safely and securely removed. Here's a step-by-step guide on how to remove a drill bit from a drill:
For Keyless Chucks (Most Modern Drills)
1.Ensure Safety:
Turn Off the Drill: Make sure the drill is turned off and unplugged (for corded drills) or the battery is removed (for cordless drills).
Secure the Drill: Place the drill in a vise or hold it firmly with one hand to prevent it from moving.
2.Loosen the Chuck:
Grip the Chuck: Firmly grip the chuck with your fingers and thumb.
Turn Counterclockwise: Rotate the chuck counterclockwise to loosen it. Apply steady pressure and turn until the bit is loose.
3.Remove the Bit:
Pull the Bit Out: Once the bit is loose, carefully pull it out of the chuck.
4.Check the Bit:
Inspect the Bit: Gently pull on the bit to ensure it is completely free. Inspect the bit for any damage or wear.
For Keyed Chucks (Older Drills)
1.Ensure Safety:
Turn Off the Drill: Make sure the drill is turned off and unplugged (for corded drills) or the battery is removed (for cordless drills).
Secure the Drill: Place the drill in a vise or hold it firmly with one hand to prevent it from moving.
2.Insert the Chuck Key:
Locate the Key: Find the chuck key that came with your drill. It is usually stored on the side of the drill or in the drill case.
Insert the Key: Insert the key into one of the holes on the side of the chuck.
3.Loosen the Chuck:
Turn Counterclockwise: Turn the chuck key counterclockwise to loosen the chuck. Apply steady pressure and turn until the bit is loose.
Move to Next Hole: Move the key to the next hole and repeat the process. Continue until the bit is fully loosened.
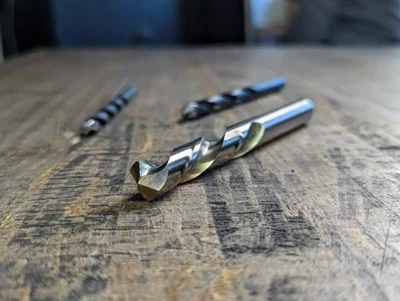
4.Remove the Bit:
Pull the Bit Out: Once the bit is loose, carefully pull it out of the chuck.
5.Check the Bit:
Inspect the Bit: Gently pull on the bit to ensure it is completely free. Inspect the bit for any damage or wear.
how do i sharpen a step drill bit
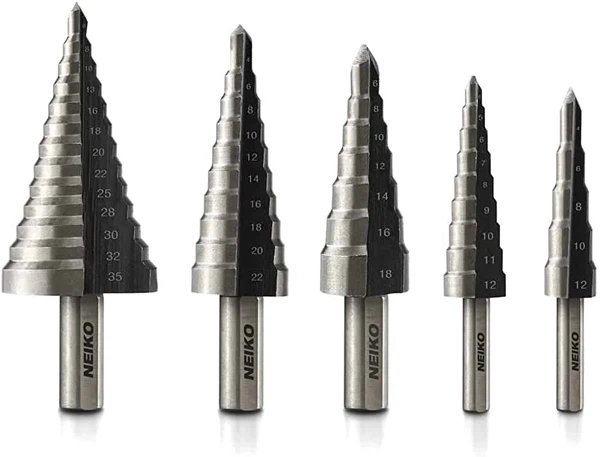
Sharpening a step drill bit can indeed be a bit tricky, but with the right tools and techniques, it can be done effectively. Here's a detailed guide on how to sharpen a step drill bit:
Tools Needed
Bench Grinder or Belt Sander: These tools are essential for sharpening the edges of the drill bit.
Safety Glasses: To protect your eyes from flying debris.
Gloves: To protect your hands, but be cautious as gloves can get caught in the grinder.
Marker: To mark the areas that need sharpening.
Steps to Sharpen a Step Drill Bit
Preparation
1.Inspect the Bit: Check for dull or chipped edges. Make sure the bit is clean.
2.Secure the Bit: Hold the bit firmly with pliers or a vise to keep it steady.
Sharpening Process
1.Angle the Bit: Position the step drill bit at an angle of about 60 degrees to the grinding wheel.
2.Grind the Edges: Gently press the bit against the grinding wheel, moving it back and forth to sharpen the cutting edges.
3.Rotate the Bit: Ensure you sharpen all steps evenly by rotating the bit.
4.Cool the Bit: Periodically dip the bit in water to prevent overheating.
5.Check Progress: Regularly inspect the bit to ensure even sharpening.
Final Steps
1.Deburr: Use fine-grit sandpaper to smooth any burrs or sharp edges.
2.Test the Bit: After sharpening, test the bit on a piece of scrap material to ensure it cuts cleanly.
Tips for Best Results
Maintain Consistent Pressure: This ensures even sharpening and prevents uneven wear.
Keep the Bit Cool: Overheating can weaken the bit, so keep it cool by dipping it in water.
Practice on Scrap Material: If you're new to sharpening, practice on old or worn bits.


