


To sharpen drill bits effectively, follow these detailed steps and tips:
Tools You'll Need
Bench Grinder: The most efficient and precise tool for sharpening drill bits.
Safety Glasses: Essential to protect your eyes from sparks and debris.
Gloves: To protect your hands from heat and provide a better grip.
Permanent Marker: Helps mark the cutting edges for accurate grinding.
Clamp or Vise: To hold the bit steady during sharpening.
How to Know When Your Bit Needs Sharpening
The bit squeals or smokes while drilling.
Burn marks appear on the material being drilled.
The bit skates across the surface before biting in.
You need to push harder than usual.
How to Sharpen a Drill Bit Using a Bench Grinder (Step-by-Step)
1.Safety First: Put on safety glasses and gloves.
2.Mark the Cutting Edge: Use a permanent marker to mark the cutting edges of the drill bit.
3.Hold at the Right Angle: Hold the bit at about a 60-degree angle to the grinding wheel.
4.Grind in Short Bursts: Gently press the bit into the grinder for a second or two, then pull back. Repeat in small bursts to avoid overheating.
5.Match Both Sides: Ensure both cutting edges are the same length and angle to prevent wobbling and uneven holes.
6.Check the Tip: The cutting edges should meet at a clean point. If they look symmetrical and sharp, you're done.
How to Sharpen a Drill Bit Without a Grinder
Using a Metal File: Clamp the bit in a vise and use a flat file to gently sharpen the edge. Work one side, then match the other.
Drill Bit Sharpener Tool: Attachable to a bench grinder or Dremel, these tools hold the bit at the correct angle for consistent sharpening.
How Often Should I Sharpen My Drill Bits?
Wood Bits: Every 10-15 uses.
Metal Bits: Every 5-10 uses.
Masonry Bits: As needed, as they are harder to sharpen.
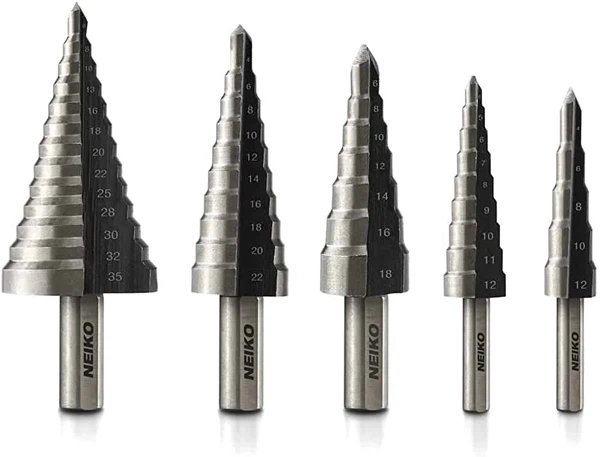
Pro Tips for Drill Bit Sharpening
Cool the Bit in Water: Between grinds to prevent overheating.
Use a Jig: Helps maintain the correct angle, especially for beginners.
Practice on Old Bits: Before sharpening your favorites.
Label Sharp Bits: With a dot of paint to easily identify them.
What to Avoid When Sharpening Drill Bits
Grinding too much and ruining the angle.
Making one side longer than the other.
Sharpening without safety gear.
Overheating the bit, which can make it brittle.
Alternative Sharpening Methods
Angle Grinder: Can be used with care, but it's harder to control the angle.
Diamond Files: Useful for small bits or touch-ups.
Drill Bit Sharpening Attachment: Can be used with a standard drill for on-the-go sharpening.
how to hold drill bit
Holding a drill bit securely is crucial for effective drilling and safety. Here's a detailed guide on how to hold a drill bit properly:
For a Keyed Chuck:
1.Unplug the Drill:
Always unplug the drill or remove the battery to prevent accidental activation.
2.Locate the Chuck Key:
The chuck key is usually stored on the side of the drill or in a compartment on the drill case.
3.Loosen the Chuck:
Insert the key into one of the holes on the chuck.
Turn the key counterclockwise to loosen the chuck. You should feel the chuck getting looser as you turn the key.
4.Insert the Drill Bit:
Place the new drill bit into the chuck. Ensure it is centered and aligned properly.
5.Tighten the Chuck:
Use the chuck key again, but this time turn it clockwise to tighten the chuck around the new drill bit. Make sure it is snug and secure.
6.Test the Bit:
Plug in the drill or insert the battery, and give it a quick test to ensure the bit is spinning properly and not wobbling.
For a Keyless Chuck:
1.Unplug the Drill:
Always unplug the drill or remove the battery to prevent accidental activation.
2.Loosen the Chuck:
Grip the collar or sleeve on the chuck and turn it counterclockwise to loosen the chuck.
3.Insert the Drill Bit:
Place the new drill bit into the chuck, making sure it is centered.
4.Tighten the Chuck:
Twist the collar clockwise to tighten the chuck around the new drill bit. You may need to apply some force to get it tight enough.
5.Test the Bit:
Plug in the drill or insert the battery and give it a quick test to ensure the bit is secure and spinning smoothly.
For a Quick-Change Chuck:
1.Unplug the Drill:
Always unplug the drill or remove the battery to prevent accidental activation.
2.Press the Release Button:
Quick-change chucks usually have a button or lever that you press to release the bit.
3.Insert the Drill Bit:
Push the new bit into the holder until it clicks into place.
4.Test the Bit:
Plug in the drill or insert the battery and give it a quick test to ensure the bit is secure and spinning smoothly.
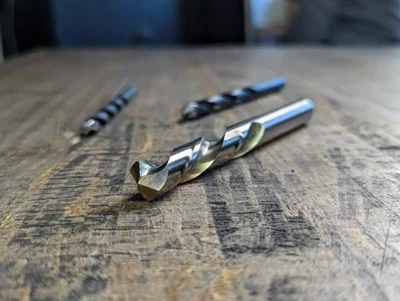
Additional Tips for Holding a Drill Bit
Ensure Proper Alignment: Make sure the drill bit is centered and properly aligned in the chuck. Misalignment can cause the bit to wobble or come loose.
Apply Even Pressure: When tightening the chuck, apply even pressure to ensure the bit is securely held.
Check for Wear: Regularly inspect the chuck and drill bit for signs of wear or damage. A worn chuck or bit can lead to slippage.
Use the Right Bit: Ensure the drill bit is the correct size and type for your project. Using the wrong bit can lead to poor performance and potential slippage.
Secure the Drill: When drilling, ensure the drill is held firmly and securely to prevent it from moving or vibrating excessively.
how to identify drill bits
Identifying drill bits involves understanding their key features, such as size, material, and design. Here's a detailed guide on how to identify different types of drill bits:
Key Features to Look For
Size:
Diameter: Measure the diameter of the drill bit using calipers or a drill bit gauge. Common sizes include 1/16 inch, 1/8 inch, 3/16 inch, 1/4 inch, 5/16 inch, 3/8 inch, 7/16 inch, and 1/2 inch.
Length: Measure the overall length of the bit to ensure it is suitable for your drilling needs.
Material:
High-Speed Steel (HSS): Commonly used for general-purpose drilling in wood, metal, and plastic. HSS bits are durable and heat-resistant.
Cobalt: Offers higher durability and heat resistance, making them suitable for harder metals like stainless steel.
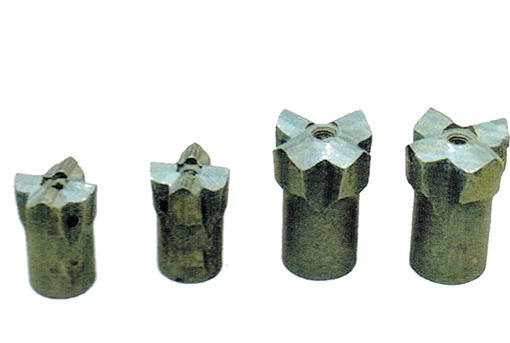
Carbide: Extremely hard and durable, ideal for drilling into very hard materials like concrete, brick, and stone.
Diamond-Coated: Used for drilling into glass, ceramic tiles, and other brittle materials.
Design:
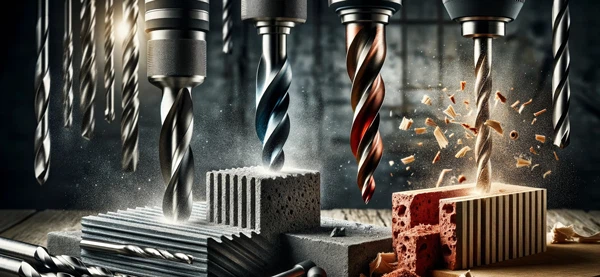
Twist Drill Bits: General-purpose bits with spiral flutes for removing chips. Suitable for wood, metal, and plastic.
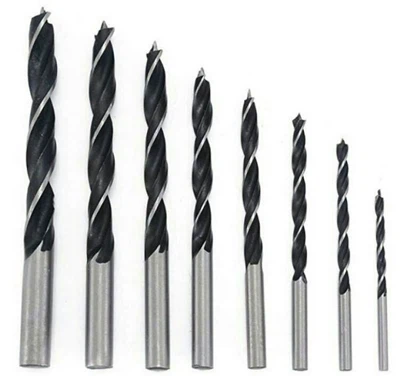
Brad Point Bits: Designed for precise drilling in wood, with a sharp point and spurs to create clean holes.
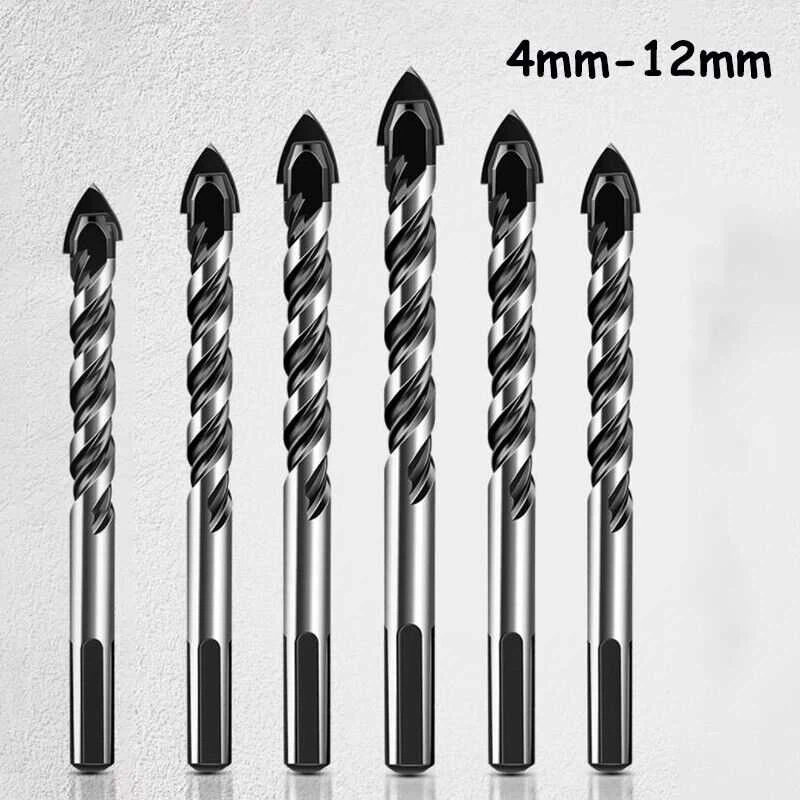
Masonry Bits: Carbide-tipped bits for drilling into concrete, brick, and stone.
Tile Bits: Diamond-tipped bits for drilling into ceramic tiles and glass.
Auger Bits: Long, spiral bits for drilling deep holes in wood.
Forstner Bits: Flat-bottomed bits for creating precise holes in wood.
Hole Saws: Cylindrical bits with teeth for cutting large-diameter holes in wood, metal, and plastic.
Coatings:
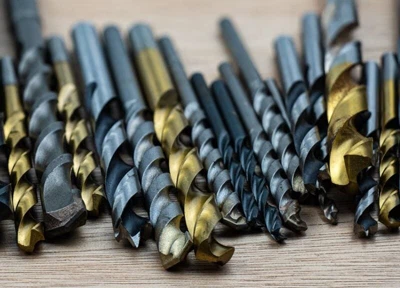
Titanium Nitride (TiN): Gold-colored coating that reduces friction and increases heat resistance.
Black Oxide: Provides additional durability and corrosion resistance.
Shank Type:
Straight Shank: Suitable for most drills with standard chucks.
Hex Shank: Designed for quick-change chucks or impact drivers.
SDS Shank: Specialized shank for use with hammer drills and rotary hammers.
How to Identify Specific Drill Bits
1. Twist Drill Bits
Appearance: Spiral flutes, suitable for general-purpose drilling.
Uses: Wood, metal, plastic.
2. Brad Point Bits
Appearance: Sharp point with spurs, designed for precise drilling.
Uses: Wood.
3. Masonry Bits
Appearance: Carbide tip, often with a conical or triangular shape.
Uses: Concrete, brick, stone.
4. Tile Bits
Appearance: Diamond tip, suitable for drilling into brittle materials.
Uses: Ceramic tiles, glass.
5. Auger Bits
Appearance: Long, spiral body with a screw tip.
Uses: Deep holes in wood.
6. Forstner Bits
Appearance: Flat-bottomed with a cutting edge.
Uses: Precise holes in wood.
7. Hole Saws
Appearance: Cylindrical with teeth around the circumference.
Uses: Large-diameter holes in wood, metal, plastic.
Tips for Identification
Check for Markings: Many drill bits have their size and material marked on the shank.
Use a Drill Bit Gauge: A tool with holes of various sizes to quickly identify the diameter of the bit.
Inspect the Tip: The shape and material of the tip can indicate the type of bit and its intended use.
how to keep a drill bit from walking
To prevent a drill bit from walking or wandering while drilling, you can follow these effective strategies:
1. Use a Center Punch
Create an Indentation: Place a center punch or nail set on the spot where you want to drill the hole and tap it firmly with a hammer to create a small indentation. This indentation will guide the drill bit and prevent it from slipping.
2. Drill a Pilot Hole
Start with a Smaller Bit: For hard or thick materials, start by drilling a pilot hole that is slightly smaller than the intended drill bit size. This pilot hole will guide the larger drill bit and prevent it from wandering.
3. Secure the Material
Clamp or Vise: Use clamps or a vise to hold the material securely in place. This prevents the material from moving and helps keep the drill bit on track.
4. Choose the Right Drill Bit
Sharp and Suitable: Ensure you are using a sharp, high-quality drill bit that is designed for the specific material you are drilling into. Dull or damaged bits are more likely to walk.
5. Apply Moderate Pressure
Let the Drill Do the Work: Avoid applying excessive downward pressure on the drill. Let the drill bit cut through the material with minimal force to prevent it from walking.
6. Use Lubrication
Reduce Friction: Apply a lubricant spray or cutting fluid to the drill bit and the surface being drilled. This reduces friction and helps the drill bit cut more smoothly, reducing the likelihood of walking.
7. Maintain the Drill
Inspect and Replace: Regularly inspect the drill and its components, such as bearings, to ensure they are in good condition. Worn-out parts can cause the drill bit to wobble and walk.
8. Use a Drill Guide
Stabilize the Drill Bit: A drill guide or a drill press can help stabilize the drill bit and ensure it drills straight and accurately.
9. Drill at the Correct Angle
Perpendicular to the Surface: Ensure the drill is held perpendicular to the material's surface to prevent the bit from walking.
how to keep drill bit cool
To keep drill bits cool and maintain their efficiency and longevity, you can employ several effective methods:
1. Use Cutting Fluids
Cutting fluids are essential for reducing friction and dissipating heat during drilling. They help maintain consistent drilling performance and improve precision by cooling the drill bits. Common types include:
Cutting Oil: Suitable for metal drilling.
Water-Soluble Oil: Effective for various materials.
Air Blast: Can be used for lighter applications.
2. Adjust Drilling Speed and Pressure
Higher drilling speeds generate more friction and heat. Adjusting the drilling speed and pressure can significantly reduce heat buildup. For example:
Slow Down Speeds: Reduce drilling speeds or use intermittent drilling techniques to prevent excessive heat.
Apply Steady Pressure: Avoid applying excessive force, which can cause the bit to overheat.
3. Peck Drilling
For deep holes, practice peck drilling by retracting the bit periodically. This allows for better cooling and chip evacuation, preventing the bit from overheating.
4. Regular Maintenance
Regularly check and clean the coolant delivery system to ensure uninterrupted cooling during drilling operations. This includes:
Cleaning Ventilation Openings: Use compressed air to blow out dust from motor vents.
Replacing Worn Components: Inspect and replace worn brushes, batteries, and damaged power cords.

5. Use the Correct Drill Bit for the Material
Using specialized bits for specific materials prevents unnecessary strain and heat generation. For example:
Wood Bits: Avoid using these on metal.
Titanium-Coated or Cobalt Bits: Ideal for metals.
Masonry Bits with Carbide Tips: Suitable for concrete and stone.
6. Implement Cooling Systems
For high-volume or demanding drilling applications, consider more sophisticated cooling systems:
Coolant Systems: These systems provide a continuous flow of cutting fluid, ensuring optimal cooling.
Air Cooling: Direct a stream of compressed air at the cutting area to dissipate heat and remove chips.
7. Monitor Bit Temperature
Keep an eye on the temperature of your drill bits during use. If the bit becomes too hot to touch comfortably, take a break to allow it to cool down.
8. Workpiece Clamping
Securely clamp the workpiece to prevent movement during drilling. This reduces vibration and heat generation, ensuring a stable cutting environment.
how to keep drill bits from falling out
To prevent drill bits from falling out of the chuck, it's important to ensure they are securely fastened. Here's a detailed guide to help you keep drill bits from falling out:
For a Keyed Chuck:
1.Unplug the Drill:
Always unplug the drill or remove the battery to prevent accidental activation.
2.Locate the Chuck Key:
The chuck key is usually stored on the side of the drill or in a compartment on the drill case.
3.Loosen the Chuck:
Insert the key into one of the holes on the chuck.
Turn the key counterclockwise to loosen the chuck. You should feel the chuck getting looser as you turn the key.
4.Insert the Drill Bit:
Place the new drill bit into the chuck. Ensure it is centered and aligned properly.
5.Tighten the Chuck:
Use the chuck key again, but this time turn it clockwise to tighten the chuck around the new drill bit. Make sure it is snug and secure.
6.Test the Bit:
Plug in the drill or insert the battery, and give it a quick test to ensure the bit is spinning properly and not wobbling.
For a Keyless Chuck:
Unplug the Drill:
Always unplug the drill or remove the battery to prevent accidental activation.
Loosen the Chuck:
Grip the collar or sleeve on the chuck and turn it counterclockwise to loosen the chuck.
Insert the Drill Bit:
Place the new drill bit into the chuck, making sure it is centered.
Tighten the Chuck:
Twist the collar clockwise to tighten the chuck around the new drill bit. You may need to apply some force to get it tight enough.
Test the Bit:
Plug in the drill or insert the battery and give it a quick test to ensure the bit is secure and spinning smoothly.
For a Quick-Change Chuck:
Unplug the Drill:
Always unplug the drill or remove the battery to prevent accidental activation.
Press the Release Button:
Quick-change chucks usually have a button or lever that you press to release the bit.
Insert the Drill Bit:
Push the new bit into the holder until it clicks into place.
Test the Bit:
Plug in the drill or insert the battery and give it a quick test to ensure the bit is secure and spinning smoothly.
Additional Tips for Ensuring the Bit Stays in Place
Ensure Proper Alignment: Make sure the drill bit is centered and properly aligned in the chuck. Misalignment can cause the bit to wobble or come loose.
Apply Even Pressure: When tightening the chuck, apply even pressure to ensure the bit is securely held.
Check for Wear: Regularly inspect the chuck and drill bit for signs of wear or damage. A worn chuck or bit can lead to slippage.
Use the Right Bit: Ensure the drill bit is the correct size and type for your project. Using the wrong bit can lead to poor performance and potential slippage.
Secure the Drill: When drilling, ensure the drill is held firmly and securely to prevent it from moving or vibrating excessively.
how to keep drill bits from rusting
To prevent drill bits from rusting, it's essential to store and maintain them properly. Here's a detailed guide on how to keep your drill bits in optimal condition:
1. Clean the Bits Thoroughly
Remove Debris: After each use, clean the drill bits to remove any dust, chips, or debris. Use a soft brush or cloth to wipe them clean.
Use a Cleaning Solution: For more thorough cleaning, use a mild detergent or a specialized cleaning solution. Soak the bits for a few minutes, then scrub gently with a brush.
2. Dry the Bits Completely
Pat Dry: After cleaning, use a clean, dry cloth to pat the bits dry. Ensure there is no moisture left on the surface.
Air Dry: Allow the bits to air dry for a few minutes to ensure they are completely dry before storing them.
3. Apply a Protective Coating
Oil or Lubricant: Apply a thin layer of machine oil, penetrating oil, or a specialized rust inhibitor to the bits. This creates a protective barrier against moisture.
Wipe Excess: Use a cloth to remove any excess oil to prevent it from attracting dust.
4. Store in a Dry, Cool Place
Avoid Humidity: Store your drill bits in a dry, cool place, away from direct sunlight and moisture. High humidity can accelerate rust formation.
Use a Storage Case: Invest in a good-quality storage case or container with compartments to keep the bits organized and protected.
5. Regular Inspection and Maintenance
Inspect Regularly: Periodically check your drill bits for signs of rust or wear. Address any issues promptly to prevent further damage.
Sharpen When Necessary: Dull bits require more force to cut, which can generate more heat and lead to rust. Keep your bits sharp to ensure efficient performance.
6. Use Rust-Resistant Bits
Stainless Steel Bits: Consider using stainless steel bits, which are more resistant to rust than standard high-speed steel (HSS) bits.
Coated Bits: Bits with a titanium or black oxide coating can also provide additional protection against rust.
7. Preventive Measures
Avoid Excessive Heat: Overheating can weaken the bit and make it more susceptible to rust. Use appropriate speeds and lubrication when drilling.
Protective Packaging: When transporting or storing bits, use protective packaging to prevent scratches and exposure to moisture.
Tips for Long-Term Storage
Silica Gel Packets: Place silica gel packets in your storage container to absorb moisture and keep the environment dry.
Desiccant: Use a desiccant to maintain a low-humidity environment in your storage area.
how to keep drill bits from slipping
To prevent drill bits from slipping while drilling, follow these steps to ensure they are securely held and properly used:
1. Ensure Proper Bit Insertion
Center the Bit: When inserting the drill bit into the chuck, ensure it is centered and aligned properly. Misalignment can cause the bit to wobble and slip.
Secure the Bit: Tighten the chuck firmly around the bit to ensure it is snug and secure. Use the appropriate method for your drill's chuck type (keyed, keyless, or quick-change).
2. Use the Right Chuck
Keyed Chuck: Use the chuck key to tighten the chuck around the bit. Ensure the key is fully inserted and turned clockwise to secure the bit.
Keyless Chuck: Grip the collar or sleeve on the chuck and turn it clockwise to tighten the chuck around the bit. Apply even pressure to ensure it is secure.
Quick-Change Chuck: Press the release button or lever to insert the bit, then ensure it clicks into place securely.
3. Check for Wear
Inspect the Chuck: Regularly inspect the chuck for signs of wear or damage. A worn chuck may not hold the bit securely.
Inspect the Bit: Check the drill bit for any signs of damage or dullness. A damaged bit is more likely to slip.
4. Use Lubrication
Apply Lubricant: For drilling into metal, apply a cutting fluid or lubricant to reduce friction and heat. This can help the bit cut more smoothly and reduce the risk of slipping.
5. Secure the Material
Clamp the Material: Use clamps or a vise to hold the material securely in place. This prevents the material from moving and helps keep the drill bit stable.
Mark the Spot: Use a center punch or marker to mark the exact spot where you want to drill the hole. This helps guide the drill bit and prevents it from wandering.
6. Drill at the Correct Angle
Perpendicular to the Surface: Ensure the drill is held perpendicular to the material's surface. This helps the bit cut more effectively and reduces the risk of slipping.
7. Use a Pilot Hole
Start with a Smaller Bit: For hard or thick materials, start by drilling a pilot hole that is slightly smaller than the intended drill bit size. This pilot hole will guide the larger drill bit and prevent it from slipping.
8. Apply Moderate Pressure
Let the Drill Do the Work: Avoid applying excessive downward pressure on the drill. Let the drill bit cut through the material with minimal force to prevent it from slipping.
9. Use a Drill Guide
Stabilize the Drill Bit: A drill guide or a drill press can help stabilize the drill bit and ensure it drills straight and accurately.
10. Maintain the Drill
Regular Maintenance: Regularly inspect and maintain your drill and its components to ensure they are in good condition. Worn-out parts can cause the drill bit to wobble and slip.
how to keep small drill bits from breaking
To prevent small drill bits from breaking, follow these comprehensive tips:
1. Use Proper Drilling Techniques
Apply Even Pressure: Avoid applying excessive force when drilling. Let the drill do the work and apply gentle, steady pressure.
Adjust Speed: Use appropriate drilling speeds based on the material. Slower speeds are better for harder materials.
Pilot Holes: Drill pilot holes to reduce stress on the bit and ensure more accurate drilling.
2. Choose the Right Drill Bit
Material-Specific Bits: Use drill bits designed for the specific material you are drilling (e.g., HSS for metal, carbide for masonry) to reduce wear and prevent breakage.
High-Quality Bits: Invest in high-quality drill bits made from durable materials like stainless steel or cobalt.
3. Cooling and Lubrication
Use Cutting Fluids: Apply cutting oil or water-soluble lubricants to reduce friction and heat buildup.
Take Breaks: Allow the drill bit to cool periodically during prolonged drilling sessions.
4. Regular Maintenance
Keep Bits Sharp: Regularly sharpen your drill bits to maintain cutting efficiency and reduce the need for excessive force.
Inspect Bits: Regularly check for signs of wear or damage and replace dull or damaged bits.
5. Proper Storage
Dry Environment: Store drill bits in a dry, low-humidity environment to prevent rust.
Organized Storage: Use a drill bit storage case or organizer with individual slots to prevent bits from knocking into each other.
6. Avoid Common Mistakes
Avoid Lateral Force: Ensure that force is applied directly behind the drill bit to prevent lateral stress.
Prevent Overheating: Monitor heat buildup and take steps to cool the bit if it becomes too hot.


