

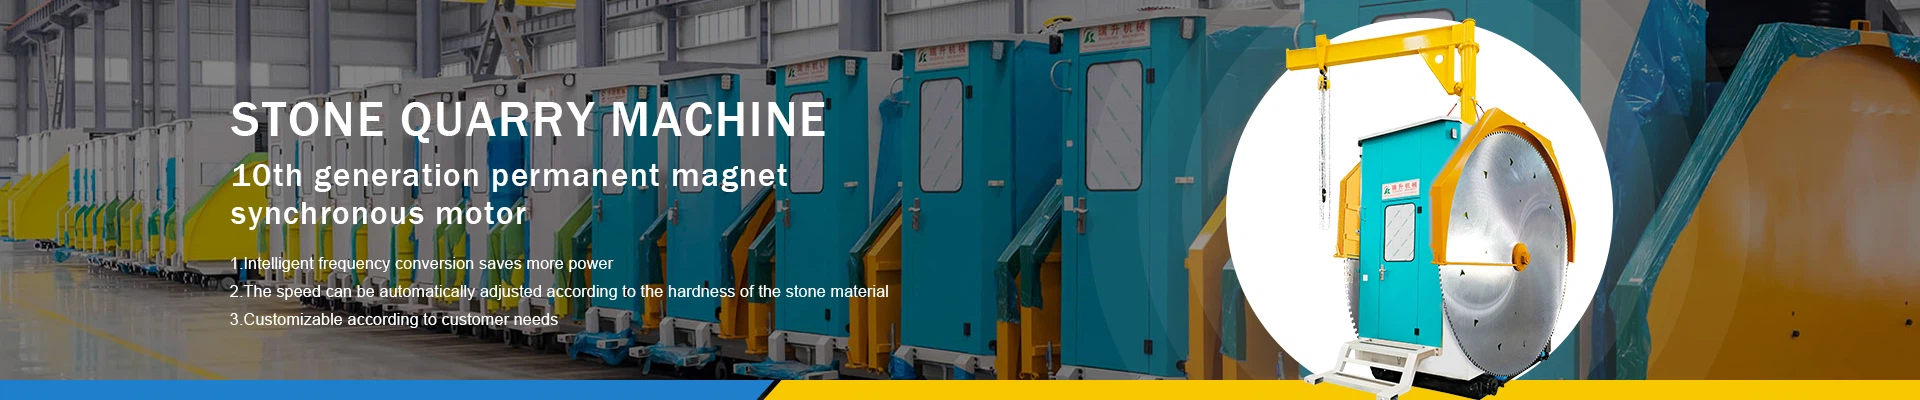
A drill bit is a cutting tool used to create holes in various materials. It is typically used with a power drill or a hand-operated drill to bore holes in wood, metal, plastic, and other materials. Here's a detailed explanation of what a drill bit is and how it works:
Key Features of a Drill Bit
1.Material:
Drill bits are made from various materials, including high-speed steel (HSS), carbide, and cobalt. The choice of material depends on the hardness of the material being drilled and the desired durability of the bit.
2.Types of Drill Bits:
Twist Drill Bits: The most common type, used for general-purpose drilling in wood, metal, and plastic.
Brad Point Bits: Designed for precise drilling in wood, with a sharp point that helps guide the bit.
Auger Bits: Used for drilling large holes in wood, often in construction.
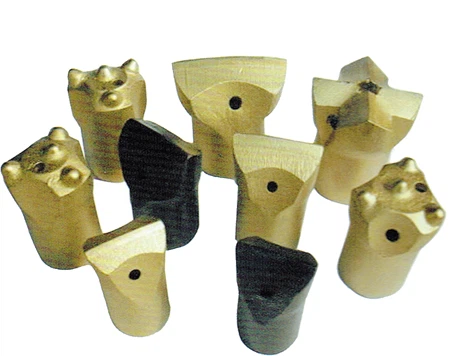
Masonry Bits: Designed for drilling into concrete, brick, and stone.
Tile Bits: Used for drilling holes in ceramic tiles and glass.
Spade Bits: Used for drilling large holes in wood.
Forstner Bits: Used for drilling precise, flat-bottomed holes in wood.
3.Size:
Drill bits come in various sizes, typically measured in fractions of an inch (e.g., 1/8 inch, 3/16 inch) or millimeters (e.g., 3mm, 6mm). The size of the bit determines the diameter of the hole it will create.
4.Flutes:
The flutes are the spiral grooves on the bit that help remove material and chips from the hole. The number and shape of the flutes can affect the bit's performance and the type of material it is best suited for.
How Drill Bits Work
1.Insertion:
The drill bit is inserted into the chuck of a drill. The chuck holds the bit securely and allows it to rotate at high speeds.
2.Rotation:
When the drill is activated, the bit rotates at high speed. The sharp cutting edges of the bit remove material as it rotates, creating a hole.
3.Material Removal:
The flutes on the bit help to remove the material and chips from the hole, preventing the bit from getting clogged and ensuring a smooth drilling process.

Importance of Drill Bits
Precision: Drill bits allow for precise hole-making in various materials, essential for construction, woodworking, and metalworking.
Versatility: Different types of drill bits are available for different materials and applications, making them versatile tools.
Efficiency: High-quality drill bits can make the drilling process more efficient, reducing the time and effort required.
Tips for Using Drill Bits
Choose the Right Bit: Select the appropriate bit for the material you are drilling and the size of the hole you need.
Secure the Bit: Ensure the bit is tightly secured in the chuck to prevent it from slipping during drilling.
Avoid Over-Tightening: While the bit needs to be secure, avoid overtightening the chuck as it can damage the bit or the chuck.
Inspect the Bit: Check the bit for any damage or wear before inserting it into the drill.
how do you change drill bits
Changing a drill bit is a straightforward process, but it's important to do it correctly to ensure safety and efficiency. Here's a step-by-step guide:
Steps to Change a Drill Bit
1.Unplug the Drill:
Always unplug the drill or remove the battery before changing the bit to prevent accidental activation.
2.Loosen the Chuck:
Keyed Chuck: If your drill has a keyed chuck, locate the chuck key that came with your drill. Insert the key into the chuck and turn it counterclockwise to loosen the chuck.
Keyless Chuck: For keyless chucks, press the release button (usually located on the side of the chuck) and twist the chuck counterclockwise to loosen it.
2.Remove the Old Bit:
Once the chuck is loose, carefully remove the old drill bit. Be sure to hold the bit by its shank (the unsharpened part) to avoid touching the sharp end.
3.Insert the New Bit:
Hold the new drill bit by its shank and insert it into the chuck. Ensure the bit is fully seated and centered in the chuck.

4.Tighten the Chuck:
Keyed Chuck: Insert the chuck key and turn it clockwise to tighten the chuck around the drill bit. Make sure the bit is secure but avoid overtightening.
Keyless Chuck: Release the button and twist the chuck clockwise until the bit is firmly held in place.
5.Check the Bit:
Ensure the bit is straight and centered. If the bit is not centered, it can cause uneven drilling and reduce the bit's lifespan.
6.Test the Drill:
Plug in the drill or insert the battery and test the drill at a low speed to ensure the bit is secure and spinning straight.
how to remove drill bit from drill
Removing a drill bit from a drill is a straightforward process, but it requires careful handling to avoid damaging the bit or the drill. Here's a step-by-step guide to help you remove a drill bit safely and efficiently:
Step-by-Step Guide
1. Ensure Safety
Unplug the Drill: Always disconnect the drill from the power source before attempting to remove the drill bit. This ensures your safety and prevents any accidental startups.
2. Release the Chuck
Keyless Chuck: For drills with a keyless chuck, hold the chuck collar with one hand and turn it counterclockwise with the other hand. This action loosens the grip on the drill bit.
Keyed Chuck: For drills with a keyed chuck, insert the chuck key into the hole on the side of the chuck and turn it counterclockwise to loosen the chuck.

3. Remove the Bit
Gently Pull the Bit: Once the chuck is sufficiently loosened, gently pull the drill bit out. If the bit is stuck, you can try gently tapping the drill housing or chuck with a rubber mallet to help release the grip.
4. Inspect the Chuck
Check for Debris: After removing the bit, inspect the chuck for any debris or dust. Cleaning the chuck regularly can prolong its lifespan.
what size drill bit for #8 screw
To determine the appropriate drill bit size for a #8 screw, you need to consider whether you are drilling a pilot hole for a self-tapping screw or a clearance hole for a machine screw. Here are the recommended drill bit sizes for both scenarios:
Pilot Hole for Self-Tapping Screw
For a #8 self-tapping screw, the recommended pilot hole size is typically a #33 drill bit. This size allows the screw to tap its own threads into the material.
Clearance Hole for Machine Screw
For a #8 machine screw, the recommended clearance hole size is typically a #21 drill bit. This size provides enough space for the screw to pass through without tapping threads.
Detailed Explanation
1.Pilot Hole (Self-Tapping Screw):
#8 Self-Tapping Screw: Use a #33 drill bit.
Purpose: The pilot hole allows the screw to tap its own threads into the material, ensuring a secure fit.
2.Clearance Hole (Machine Screw):
#8 Machine Screw: Use a #21 drill bit.
Purpose: The clearance hole allows the screw to pass through the material without tapping threads, ensuring smooth assembly.
what size drill bit for 5 16 tap
For a 5/16 tap, the drill bit size you need depends on the thread pitch of the tap. Here are the recommended drill bit sizes for the most common 5/16 tap thread pitches:
For 5/16-18 UNC (Unified National Coarse) Tap:
Recommended Drill Bit Size: F drill bit (0.257 inches)
For 5/16-24 UNF (Unified National Fine) Tap:
Recommended Drill Bit Size: I drill bit (0.272 inches)
Additional Tips:
Coarse Threads (5/16-18 UNC): Easier to tap and less likely to strip. Suitable for general-purpose applications.
Fine Threads (5/16-24 UNF): Stronger and better for precision work. Suitable for applications requiring higher accuracy.
how do i sharpen a drill bit
Sharpening a drill bit is a practical skill that can extend the life of your tools and save you money. Here's a detailed guide on how to sharpen drill bits effectively:
Tools You'll Need
Bench Grinder or Belt Sander: For sharpening the dull drill bits.
Safety Goggles: To protect your eyes from sparks and metal slivers.
Gloves: Optional, but recommended to protect your hands.
Scrap Wood: To test the sharpness of the drill bit.
Bucket of Water: To cool the drill bit during sharpening.
Permanent Marker: To mark the cutting edges of the drill bit.

Steps to Sharpen a Drill Bit
1. Examine the Bit
Identify the dull drill bit that needs attention. Look for signs of wear, chips, or dull edges.
2. Mark the Cutting Edge
Use a permanent marker to mark the cutting edges of the drill bit. This helps you keep track of what you're grinding off.
3. Hold the Bit at the Right Angle
Hold the drill bit at about a 60-degree angle to the grinding wheel. This angle helps maintain the original shape of the bit.
4. Grind in Short Bursts
Turn on the bench grinder or belt sander. Hold the drill bit against the grinding wheel, applying gentle pressure. Grind in short bursts to avoid overheating the bit.
5. Cool the Bit
After each grinding session, dip the bit in water to cool it down. Overheating can weaken the bit and reduce its effectiveness.
6. Check the Sharpness
Periodically test the sharpness of the bit on a piece of scrap wood. The bit should cut smoothly and easily through the wood.
7. Repeat if Necessary
If the bit is still dull, repeat the grinding and cooling process until the bit is sharp.
how to get a drill bit out of a drill
Removing a drill bit from a drill can sometimes be challenging, especially if the bit is stuck. Here are some effective methods to help you remove a stuck drill bit:
Method 1: Using a Chuck Key
Unplug the Drill: Ensure the drill is disconnected from the power source.
Loosen the Chuck: Insert the chuck key into the chuck and turn it counterclockwise to loosen the grip on the drill bit.
Remove the Bit: Once the chuck is loosened, gently pull the drill bit out.
Method 2: For Keyless Chucks
Unplug the Drill: Ensure the drill is disconnected from the power source.
Loosen the Chuck: Hold the chuck collar and turn it counterclockwise to loosen the grip on the drill bit.
Remove the Bit: Gently pull the drill bit out once the chuck is loosened.
Method 3: Using Pliers
Unplug the Drill: Ensure the drill is disconnected from the power source.
Loosen the Chuck: If the bit is still stuck, use pliers to grip the bit and twist it counterclockwise.
Remove the Bit: Gently pull the bit out after loosening it with the pliers.

Method 4: Applying Lubricant
Unplug the Drill: Ensure the drill is disconnected from the power source.
Apply Lubricant: Apply a lubricant like WD-40 around the drill bit to help loosen it.
Wait and Remove: Allow the lubricant to sit for a few minutes, then try removing the bit.
Method 5: Using a Drill Bit Extractor
Unplug the Drill: Ensure the drill is disconnected from the power source.
Use an Extractor: Use a drill bit extractor tool to grip and twist the bit counterclockwise.
Remove the Bit: Gently pull the bit out after loosening it with the extractor.
how to release drill bit
Removing a drill bit from a drill can sometimes be challenging, especially if the bit is stuck. Here's a step-by-step guide to help you safely and effectively remove a stuck drill bit:
1. Ensure Safety
Unplug the Drill: Always disconnect the drill from the power source before attempting to remove the drill bit.
2. Loosen the Chuck
Keyless Chuck: For drills with a keyless chuck, hold the chuck collar and turn it counterclockwise to loosen the grip on the drill bit.
Keyed Chuck: For drills with a keyed chuck, insert the chuck key into the chuck and turn it counterclockwise to loosen the chuck.
3. Remove the Bit
Gently Pull the Bit: Once the chuck is loosened, gently pull the drill bit out. If the bit is stuck, you can try gently tapping the drill housing or chuck with a rubber mallet to help release the grip.
4. Use Pliers
If the bit is particularly stubborn, use pliers to grip the bit and twist it counterclockwise.
5. Apply Lubricant
Applying a lubricant like WD-40 around the bit can help in loosening it. Allow the lubricant to sit for a few minutes before attempting to remove the bit again.

6. Use a Drill Bit Extractor
For severely stuck bits, consider using a drill bit extractor set.
7. Inspect the Chuck
After removing the bit, inspect the chuck for any debris or dust. Cleaning the chuck regularly can prolong its lifespan.
how to take a drill bit out
Removing a stuck drill bit can be frustrating, but with the right techniques and tools, you can successfully release it. Here's a step-by-step guide to help you remove a drill bit safely and efficiently:
Step-by-Step Guide
1. Ensure Safety
Unplug the Drill: Always disconnect the drill from the power source before attempting to remove the drill bit.
2. Loosen the Chuck
Keyless Chuck: For drills with a keyless chuck, hold the chuck collar and turn it counterclockwise to loosen the grip on the drill bit.
Keyed Chuck: For drills with a keyed chuck, insert the chuck key into the chuck and turn it counterclockwise to loosen the chuck.
3. Remove the Bit
Gently Pull the Bit: Once the chuck is loosened, gently pull the drill bit out. If the bit is stuck, you can try gently tapping the drill housing or chuck with a rubber mallet to help release the grip.
4. Use Pliers
If the bit is particularly stubborn, use pliers to grip the bit and twist it counterclockwise.
5. Apply Lubricant
Applying a lubricant like WD-40 around the bit can help in loosening it. Allow the lubricant to sit for a few minutes before attempting to remove the bit again.

6. Use a Drill Bit Extractor
For severely stuck bits, consider using a drill bit extractor set.
7. Inspect the Chuck
After removing the bit, inspect the chuck for any debris or dust. Cleaning the chuck regularly can prolong its lifespan.
what size drill bit for 1/2 tap
To tap a hole for a 1/2 inch (1/2-13 or 1/2-20) thread, you need to select the appropriate drill bit size based on the type of thread (coarse or fine) and the material you are working with.
For 1/2-13 (coarse thread):
Drill bit size: Typically, a #1 drill bit or a 0.468 inch diameter drill bit is used for a 1/2-13 coarse thread. This size is suitable for creating a pilot hole that will allow the tap to cut the threads properly.
For 1/2-20 (fine thread):
Drill bit size: A smaller drill bit is needed for a fine thread. Usually, a #3 drill bit or a 0.437 inch diameter drill bit is recommended for a 1/2-20 fine thread.
how to replace drill bit
Replacing a drill bit is a straightforward process, but the exact steps can vary depending on the type of drill and chuck (the part that holds the drill bit) you are using. Here's a general guide to help you replace a drill bit:
For a Keyed Chuck (the most common type):
1.Unplug the Drill: Safety first! Make sure the drill is unplugged or the battery is removed to prevent accidental activation.
2.Insert the Key: Locate the chuck key that came with your drill. Insert the key into one of the holes on the chuck.
3.Loosen the Chuck: Turn the key counterclockwise to loosen the chuck. You should feel the chuck getting looser as you turn the key.
4.Remove the Old Drill Bit: Once the chuck is loose, you can pull out the old drill bit. It might be a bit tight, so you may need to wiggle it gently.
5.Insert the New Drill Bit: Place the new drill bit into the chuck. Make sure it is centered and aligned properly.
6.Tighten the Chuck: Use the chuck key again, but this time turn it clockwise to tighten the chuck around the new drill bit. Make sure it is snug and secure.
7.Test the Bit: Plug in the drill or insert the battery, and give it a quick test to ensure the bit is spinning properly and not wobbling.
For a Keyless Chuck:
1.Unplug the Drill: Again, make sure the drill is unplugged or the battery is removed.
2.Loosen the Chuck: For a keyless chuck, there is usually a collar or sleeve that you can twist by hand. Grip the collar and turn it counterclockwise to loosen the chuck.
3.Remove the Old Drill Bit: Once the chuck is loose, pull out the old drill bit.
4.Insert the New Drill Bit: Place the new drill bit into the chuck, making sure it is centered.
5.Tighten the Chuck: Twist the collar clockwise to tighten the chuck around the new drill bit. You may need to apply some force to get it tight enough.
6.Check the Bit: Plug in the drill or insert the battery and test the bit to make sure it is secure and spinning smoothly.

For a Quick-Change Chuck (also known as a screwdriver bit holder):
1.Unplug the Drill: Safety first!
2.Press the Release Button: Quick-change chucks usually have a button or lever that you press to release the bit.
3.Remove the Old Bit: Pull out the old bit. It should come out easily once the release button is pressed.
4.Insert the New Bit: Push the new bit into the holder until it clicks into place.
5.Test the Bit: Plug in the drill or insert the battery and give it a quick test to ensure the bit is secure.


